


Ideas for enhancing electrolysis practical work
David Everett suggests ideas for enhancing electrolysis practical work
This article is also available in Welsh

Read the Welsh language version.
Why study electrolysis?
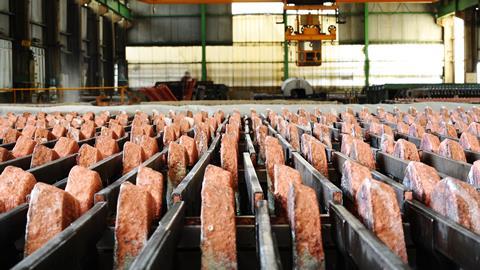
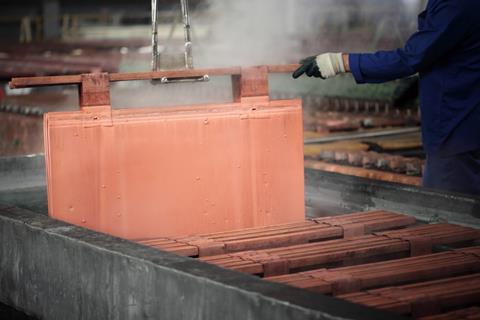
Electrolysis is at the heart of aluminium production, copper purification, and the production of sodium hydroxide and chlorine. Students will appreciate the relevance of these processes when they find out the annual world production of these chemicals is measured in megatonnes (table 1, below).
The electrolytic processes that students see in the laboratory can be put into their industrial perspective through video clips such as those in the Alchemy? online resource.
The electrolytic processes that students see in the laboratory can be put into their industrial perspective through video clips such as those in the Alchemy? online resource.4
Electrolysis and its applications feature in all GCSE examination specifications. Practical work based on electrolysis is a required activity in the assessment of students’ practical skills (table 2, below).
Underpinning chemistry and progression
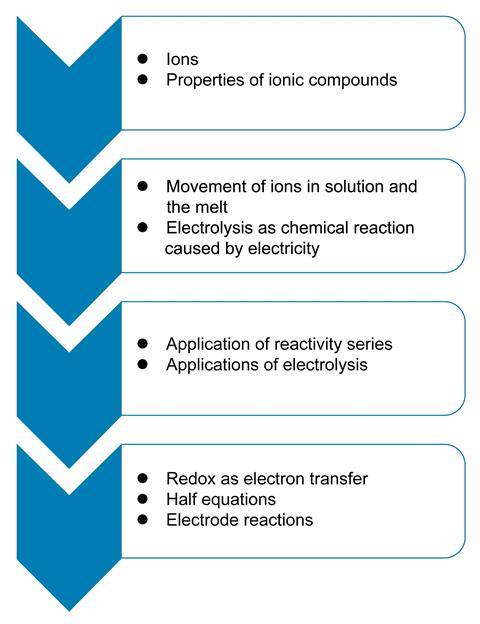
Electrolysis does not appear in isolation in schemes of work and it is important to consider the prior knowledge students require to understand it.
Earlier, students learn about ions and the properties of ionic substances. They learn that ions can move when in solution or in the melt, and that this electrolyte will conduct an electrical current. It is then a small step for them to appreciate electrolysis as chemical reactions caused by a flow of current.
As students investigate various electrolysis processes, they can apply their knowledge of the reactivity series to explain the products formed, particularly when there are several possibilities. Knowledge of the reactivity series will help them understand why hydrogen is produced at the negative electrode when aqueous sodium chloride is electrolysed, but copper is produced at this electrode when aqueous copper(II) chloride is used.
At a higher level, more able students will come to understand that electron transfer occurs at the electrodes. Half equations are used to describe the electrode reactions and this links to post-16 study, when redox potentials are used to explain and justify the reactivity series.
Developing practical skills
It is important that students’ practical work is engaging, gives clear results that allow a positive interpretation of observations, works reliably and can be carried out safely.
Most UK examination boards allow teachers flexibility in how electrolysis experiments are carried out and in the choice of solutions investigated. It is desirable that students engage in these experiments in an investigative way rather than following a recipe with expected results. Carrying out a series of experiments on a number of solutions and testing the products allows students to analyse their observations and investigate the products’ identity. Students can then discover how the products relate to work they have done on the reactivity series. This will connect with work in post-16 courses on redox potentials.
Students need to practise using electrolytic cells in order to satisfy the requirements of examination boards and demonstrate they have acquired the requisite skills. The use of some types of apparatus will discourage teachers from arranging sufficient practical work because of the expense, the quantities of chemicals used, the potential hazards associated with the process and the need for sufficient power supplies. However, there are alternatives.
Synoptic approach
Example: the electrolysis of several aqueous salt solutions
Some possible questions to get your students started:
- What salts will you investigate?
- Where are the metals in these salts positioned in the reactivity series?
- What equipment will you need?
- How can you collect any gases produced at electrodes?
- How have you previously tested gases to identify them?
Planning activity
Explain how you would carry out each step in your investigation. Give details of all the equipment and chemicals needed and procedures used.
Practical problems and suggested solutions
Improving the results
In the electrolysis of copper(II) salts on a bulk scale, the deposition of copper on the negative electrode is difficult to see through the deep blue solution, and the reduction in the concentration of the copper(II) ions is barely perceptible. Furthermore, in the electrolysis of solutions of chlorides the evolution of significant amounts of chlorine can cause distress to students and teachers.
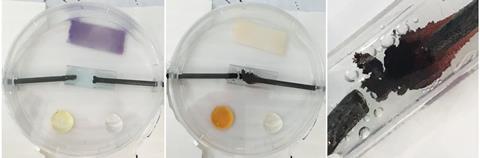
However, a microscale version of the electrolysis of aqueous copper(II) chloride can be carried out on only two or three drops of solution (figure 2). In just a few minutes, the blue colour is reduced to virtually colourless, the chlorine generated at the positive electrode turns a blue litmus paper red and is then bleached, and a drop of aqueous potassium iodide turns brown. Students are able to see these changes easily and deduce the products at the electrodes. The very small amount of chlorine produced is largely absorbed by the test reagents and any excess is confined beneath the petri dish lid.
Plastic takeaway food boxes can be used to store and distribute all the apparatus and chemicals for a microscale experiment. These make it easier to organise a practical lesson and reduce the need for students to gather apparatus from around the laboratory.
Anodes and cathodes
In this article I have avoided using the terms anode and cathode as they can confuse students: the anode is the positive electrode in electrolysis but the negative electrode in electrochemical cells. When using the term anode with your students it is important to emphasise this is the electrode where oxidation takes place.
In this article I have avoided using the terms anode and cathode as they can confuse students: the anode is the positive electrode in electrolysis but the negative electrode in electrochemical cells. When using the term anode with your students it is important to emphasise this is the electrode where oxidation takes place.7
Electrolysis equipment
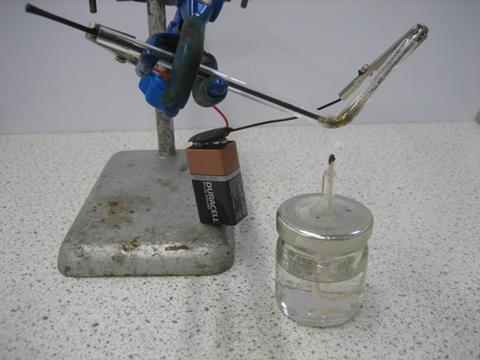
At GCSE level, students are only required to carry out the electrolysis of aqueous salt solutions. However, they also require knowledge of the electrolysis of molten salts. Rather than show video clips teachers may wish to demonstrate this process, but it is not straightforward. Lead bromide and zinc chloride are often used but, if performed on the scale usually suggested, the demonstration must be carried out in a fume cupboard and the opaque crucible makes it difficult for students to observe the molten salt. A microscale approach overcomes both these problems and the process can be seen easily (figure 3).
At GCSE level, students are only required to carry out the electrolysis of aqueous salt solutions. However, they also require knowledge of the electrolysis of molten salts. Rather than show video clips, teachers may wish to demonstrate this process, but it is not straightforward. Lead bromide and zinc chloride are often used but, if performed on the scale usually suggested,5 the demonstration must be carried out in a fume cupboard and the opaque crucible makes it difficult for students to observe the molten salt. A microscale approach overcomes both these problems and the process can be seen easily (figure 3).
It is not necessary to use an expensive DC power supply for practical work: these are sometimes mishandled by students, consequently blowing fuses or trip switches. Often a simple PP3 9V battery with connectors and crocodile clips will be more than adequate and avoid these problems.
Carbon rods or pencil ‘leads’ (graphite) are often used as electrodes in school experiments. Unfortunately, they are brittle and easily snapped and this can be a problem when inserted through a bung: breaks are not easily seen and students can wearily report that the apparatus is not working. An alternative is to use 2 mm carbon fibre rods as electrodes. These are sold to construct kite frames, being lighter, stiffer and stronger than traditional cane rods. They can be cut into short lengths (using a strong pair of pliers) and make excellent electrodes that do not break in use.
Students can find it difficult to collect gas from an electrode using an inverted test tube filled with solution: the solution inevitably pours out of the tube. An alternative is to use a syringe with the end of the barrel cut off (figure 4). Push the plunger in and lower the syringe into the cell above the electrode. Withdraw the plunger to pull electrolyte into the syringe over the electrode – it is now ready to collect gas. The graduations on the syringe can be used to measure the quantity of gas produced.
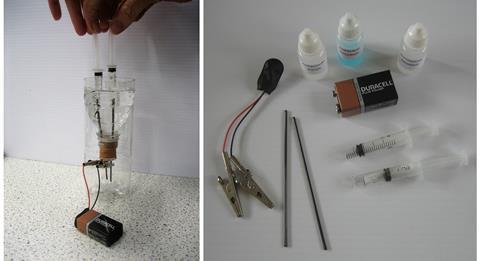
A Hofmann voltameter is often used for demonstrating the quantitative electrolysis of water. However, these are expensive and their purchase cannot be justified for occasional use. One alternative is to construct a microscale version from plastic syringes and 3-way taps (figure 5).
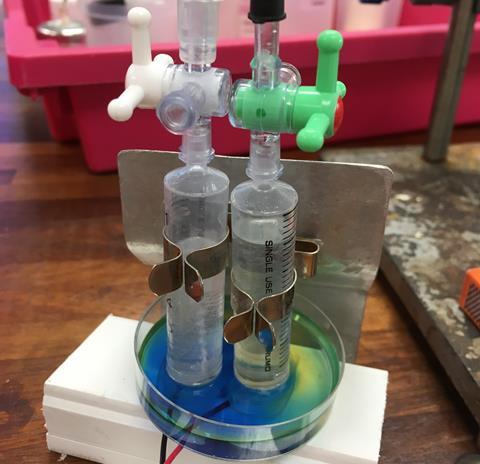
Details of how to make the microscale electrolysis apparatus and Hofmann voltameter are on the CLEAPSS website.
Details of how to make the microscale electrolysis apparatus and Hofmann voltameter are on the CLEAPSS website.6
More resources
Learn Chemistry has a variety of electrolysis resources for students and teachers at all levels. Some provide further background information on industrial applications and include video clips filmed in industry.4 There are resources that show the historical development of electrolytic processes and theory.8 Other resources give details of experiments that have been tried and tested over many years.9 Also, Education in Chemistry has a demonstration to show the movement of ions.10
We have a variety of electrolysis resources for students and teachers at all levels, including …
- Background information on industrial applications, with video clips filmed in industry.
- On this day: 4 January describes the historical development of electrolytic processes.
- A tried-and-tested class experiment to indentify the products of electrolysis.
- A class practical investigating the movement of ions.
- A practical video complete with integrated instructions showing the electrolysis of aqueous solutions for 14–16 year-old learners.
- Advice on avoiding common misconceptions in this article and accompanying worksheet.
- A real-world example of research into electrolysis, complete with a summary slide and questions for 14–16 year-old learners.
David Everett is a retired chemistry teacher now working as an independent science education consultant
References
- List of countries by aluminium production: bit.ly/2rxA8SW
- The essential chemical industry – chlorine: bit.ly/2rDjpbW
- The essential chemical industry – sodium hydroxide: bit.ly/2tu3vSo
- Alchemy? rsc.li/2tufMWS
- Electrolysing molten lead(II) bromide rsc.li/2sFr668
- CLEAPSS: science.cleapss.org.uk
- Redox: reducing difficulties eic.rsc.org/2000011.article
- On this day in chemistry: rsc.li/2rCCFGC
- Identifying the products of electrolysis: rsc.li/2shtLQv
- Migration of coloured ions: eic.rsc.org/2020064.article
- List of countries by aluminium production
- The essential chemical industry – chlorine
- The essential chemical industry – sodium hydroxide


1 Reader's comment