


Tom Husband explains how varnishing your nails is more like making plastic than painting
Advances in science have improved lives in many ways. Medicines have increased life expectancy, we have been blessed with computers and televisions, and flight has opened up the world for travel.
Cosmetics, the ‘science of looking good’, is no exception. In ancient times, women applied crushed bugs directly to their skin. Nowadays, there is a huge array of products that variously promise to abolish wrinkles, destroy dandruff and restore vibrancy to worn out hair.
Nail varnish has evolved, too. Good old nail polish, which chips easily and has to be constantly reapplied, has been superseded by durable varnishes such as Shellac, which can endure two weeks of hard knocks before they look worn. But just how do these work?
The two styles of varnish are very different. Classic nail polish is essentially the same as paint. The three main things needed to make it work are a pigment, which provides the colour, an adhesive, which sticks the pigment to whatever you are painting and a solvent, which keeps the paint in a liquid form until it has been applied to the surface, where it can dry out and solidify into a permanent finish. This is different from Shellac, which is an example of a light-cured gel varnish.
This means that ultraviolet (UV) light is used to create a polymer on the fingernail.
Coating and curing
Let’s start with what happens when you put on gel varnish nails. The first step is to prepare the fingernails so that they are ready to be coated. This means they should be cleaned, disinfected and buffed.
Next the base coat is applied. This is painted on using a brush, just like normal nail polish. What happens next is the different part. The beauty technician will place the nails under a UV lamp to cure the base coat, meaning that it turns from a liquid to a solid.
Now the main coat is applied. This will give the varnish its final colour. Just like the base coat, this is painted onto the nail and then cured under the UV lamp. The main coat is not applied all in one go, but in a series of thin layers, each of which has to be separately cured under the UV lamp.
After several applications of the main coat, a top coat is applied, which is usually the same substance as the base coat. A final exposure under the lamp completes the curing process. At this stage, the nails are wiped with a solvent, such as acetone, to remove any tacky residue. Finally, after being filed and dusted off, the nails are ready.
Starting a chain reaction
Placing the nails under the UV lamp is a vital stage of the process. The UV radiation triggers a chemical reaction that causes a large number of small molecules, which we call monomers, to join together into long chains called polymers. You can think of the monomers as beads being strung together into a long necklace, which represents the polymer. In the case of nail varnish, this is an example of radical addition polymerisation – the ultraviolet light creates radicals that join the monomers together.
Radicals are highly reactive chemical species with unpaired electrons. When a chemical bond absorbs UV radiation of the correct wavelength, a bond can undergo homolytic fission, meaning that the bonding pair of electrons is separated with one electron going to each of the bonded atoms. An unpaired electron will rapidly pair up with another electron, which is often snatched from another bond. This means that two more electrons are separated, one of which makes a bond with the first radical, and the second of which remains unpaired, creating a new radical. This is a great example of a chain reaction.
UV light
A ÷ B → A• + B•
A• + C - D → A - C + D•
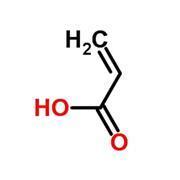
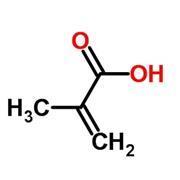
The monomers used in Shellac nails are methacrylates. The word acrylate describes many kinds of compounds, all of which derive from propenoic acid (commonly called acrylic acid. Methacrylates are acrylates with a methyl group on the second carbon atom.
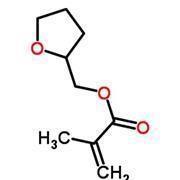
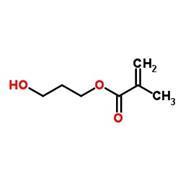
Further modifications can then produce derivatives like tetrahydrofurfuryl methacrylate and hydroxypropyl methacrylate (HPMA), both of which are ingredients in Shellac.
Another chemical ingredient in Shellac is (1-hydroxycyclohexyl)(phenyl)methanone, which acts as a photoinitiator. Photoinitiators are chemicals that readily absorb UV light to become radicals. A carbon–carbon bond is broken by the light and then each unpaired electron will pair up with a new electron.
Most of the time this new electron will be taken from the double bond in a methacrylate monomer molecule. One of the two doubly bonded carbons will form a new bond with the photoinitiator fragment, while the other carbon will be left with an unpaired electron. This radical may then attack another methacrylate monomer with the chain reaction repeating until a long polymer chain has been created.
Radical chain reactions are ended when two separate radicals collide. In this case, termination could occur when two growing chains of monomers collide.
While this is a feasible mechanism for the polymerisation of a methacrylate, it is not a very accurate description of what happens when Shellac is applied. The methacrylates listed in the ingredients do polymerise, but not just with each other. In fact, they form a huge, criss-crossing network of polymer chains with another variety of compounds called urethanes.
The chemical network
There are two examples of urethanes in Shellac varnish. They are di-HEMA trimethylhexyl dicarbamate and bis-HEMA poly(1,4-butanediol)-22/IPDI copolymer. Notice that both names contain HEMA, which stands for hydroxyethyl methacrylate – another methacrylate. Also notice the word copolymer in the second ingredient – this is a polymer composed of two or more different monomers. The two polymers used in urethanes are alcohols, such as HEMA, and carbamates. These urethane ingredients can also be referred to as oligomers; they consist of three or four monomers that have already been joined together.
Let’s review the situation. Shellac varnish is a concoction of monomers and oligomers of varying length. The gel is essentially a mixture of polymers at different stages of development, rather like a forest in which young saplings grow alongside giant redwoods. If all of these trees were cut down, they could be used to make wooden beams of different lengths. These in turn could be assembled into a house, with the shorter beams being used to make window frames, medium-length beams to make doorways and the longest beams to make the frame of the house. Similarly, the Shellac ingredients join into one giant structure.
In spite of their many differences, what all of these varnish ingredients have in common is that they each contain some kind of methacrylate. This means that all of the monomers and oligomers can join together by the same radical addition reaction that we saw for the methacrylate monomers.
When the mixture is exposed to UV light, all of the different pieces link together. The longer oligomers will join up to make long chains, while the monomers create cross links that bind the chains together into a huge, interconnected network of chains.
This cross-linking makes Shellac an example of a thermoset plastic, meaning that it can’t be melted or dissolved. However, these polymers can absorb solvents, such as acetone, which can transform them back into a gel. This is how gel varnish is removed.
Did you know?

The word shellac comes from the lac insect from south-east Asia. The first version of the varnish was made with a resin gathered from the female insect.
According to the Online Etymology Dictionary, the word used to have two slang meanings. In the 1920s, to be shellacked meant either to be soundly beaten or to be blind drunk!
Striking the balance
There are two benefits to using this blend of monomers and oligomers. Firstly, it makes the reaction go faster. The longer the oligomer, the harder it is to turn it into a radical and react it with a neighbour. On the other hand, if the mixture was composed solely of monomers, more chemical bonds would have to be made. So if the varnish consisted solely of monomers, or oligomers, the gel would need to be cured for longer under the UV lamp. Also, oligomers are more viscous than monomers, meaning they flow more slowly. A varnish consisting only of monomers would be so runny that it would spill off the nail onto the surrounding skin, which we really don’t want – these compounds irritate the skin.
So why is the varnish applied in layers? UV radiation cannot penetrate very far into the gel, so it must be brushed on in thin layers to ensure that the mixture is completely polymerised.
The ingredients we have seen are those involved in polymerisation but many more are added. There are emulsifiers that keep all the other ingredients in solution, cellulose acetate butyrate is used because its UV resistance maintains the nails’ glossy appearance, dyes provide colour and plasticisers keep the varnish flexible so it does not snap.
As we have seen, the chemistry of Shellac varnish is very complex. Luckily, the complicated science is carried out in the lab, making life simple at the salon. Building on a long tradition of polymer research, cosmetic scientists have found another way to make life easier, with nails that keep their glossy appearance for longer.
Did you know?
Although gel-cured nail varnishes are great for keeping nails pretty, it’s important to consider their impact on health. Acetone, used in application and removal of Shellac, and UV light are both harmful to skin. Because of this, in 2013, dermatologist Chris Adigun warned against applying Shellac too often.
Originally published in The Mole


No comments yet