


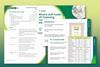
Banish student confusion about period 3 trends with this handy modelling guide
During the periods of remote teaching, our school had screen-free learning days. We used those days to teach period 3 elements and their oxides using modelling tasks the students could do at home. Now we’re back in the lab, I’ve successfully adapted the tasks into a new scheme of work.
The tasks
Using materials found around your home, make models to show these structures. Take a photo of your model.
One: elements
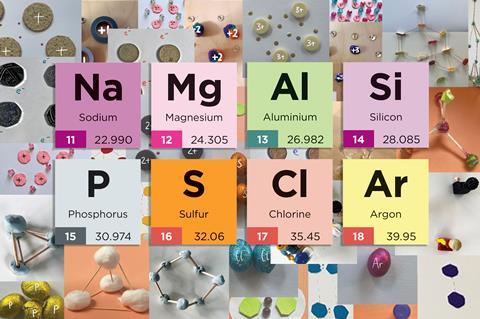
Show the structures of the elements of period 3, from Na to Ar.
Identify:
- the types of bonding for each element (covalent, ionic, metallic).
- the 3D structure of each element, representing these in your models.
Two: oxides
Show the structures of the oxides of the period 3 elements, from Na to S.
Identify:
- the types of bonding for each oxide (covalent, ionic).
- the 3D structure of each oxide, representing these in your models.
Three: acids and their anions
Show phosphoric acid, sulfurous acid and sulfuric acid clearly in 3D, uniquely identifying each element within the structure.
- Identify the oxidation state of the period 3 element in each acid.
- Name the acid, using Roman numerals in brackets to give the oxidation state.
During the periods of remote teaching, our school had screen-free learning days. We used those days to teach period 3 elements and their oxides using modelling tasks the students could do at home.
The remote teaching tasks
Students use household materials to make models, showing the structures of (1) elements, (2) oxides and (3) acids and their anions (3), and take a photo of each model. For task 1, show the structures of the elements of period 3, from Na to Ar, and identify the types of bonding for each element (covalent, ionic, metallic). They need to show the 3D structure of each element, representing these in models. For task 2, they show the structures of the period 3 elements oxides, from Na to S, identifying the types of bonding for each oxide (covalent, ionic) and the 3D structure of each oxide, represented in their models. For task 3, they show phosphoric acid, sulfurous acid and sulfuric acid clearly in 3D, uniquely identifying each element within the structure. They identify the oxidation state of the period 3 element in each acid and name the acid using Roman numerals to give the oxidation state.
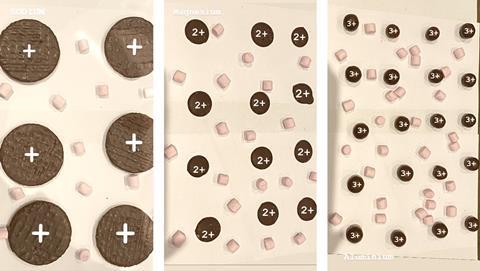
These tasks get students working creatively, using a wide range of materials to represent the elements. Task 1 reveals many misconceptions, including the difference between bonding and structure, the decrease in ionic radius versus the increase in ionic charge from Na to Ar, the giant covalent structure of Si and the formulas of the simple molecules of S8, P4 and Cl2.
Task 2 is very useful in aiding recall: which oxides are giant ionic, which are giant covalent and which are simple molecular. Months later, students remember their models. They can model why oxygen is more strongly attracted to magnesium than to sodium, as well as why MgO is a 1:1 ionic structure, whereas Na2O is a 2:1 ionic structure. This helps them understand the melting points trend.
Task 3 covers an area of the specification which can often feel like a minefield of structures and equations to learn. The models help highlight the acidic protons in each structure, and provide an opportunity to discuss how many molecules of base each acid molecule could potentially react with, and the structure of the anions formed. Students’ models are a useful visual aid, demystifying each step of deprotonation; students can simply ‘pluck’ protons from their structures. By analysing the anion formed after each step, it becomes clearer how each is named.
These tasks get students working creatively. It’s heartwarming to see their imaginations in action and the range of materials they use to represent the elements. And task one usually exposes many misconceptions, including the difference between bonding and structure, the decrease in ionic radius versus the increase in ionic charge from Na to Ar, the giant covalent structure of Si and the formulas of the simple molecules of S8, P4 and Cl2.
Following up on the task one class, I model good examples which clearly illustrate these key trends. As a class, we produce a model sheet to aid explaining the trend in melting points across the period.
Task two is very useful in aiding recall: which oxides are giant ionic, which are giant covalent and which are simple molecular. Months later, students remember their models. They can model why oxygen is more strongly attracted to magnesium than to sodium, as well as why MgO is a 1:1 ionic structure, whereas Na2O is a 2:1 ionic structure. This helps them understand the melting points trend.
Students are much more engaged with the explanations of the key trends, rather than on learning the structures. Again, the visual aid proves useful in structuring written responses to exam-style questions.
Students’ models are a visual aid, demystifying each step of deprotonation; students can simply ‘pluck’ protons from their structures
Task three covers acids and anions, an area of the specification which can often feel like a minefield of structures and equations to learn. The models help to highlight the acidic protons in each structure, and provide an opportunity to discuss how many molecules of base each acid molecule could potentially react with, and the structure of the anions formed. Students’ models are a useful visual aid, demystifying each step of deprotonation; students can simply ‘pluck’ protons from their structures. By analysing the anion formed after each step, it becomes clearer how each is named.
Modelling is an integral part of my teaching for this topic. I quickly identify misconceptions in structure and bonding at each stage, giving students confidence applying these ideas in written responses. Exam-style questions on this topic often involve extended writing; the visual aids help scaffold understanding, enabling students to tackle these questions effectively using the key ideas in a targeted, tangible way.
You can adopt these tasks for homework and incorporate them into a three-lesson sequence. This is how I’m doing it …
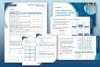
Three periods of modelling (with homework)
Homework: Task one. I use an objective checklist of the key ideas for feedback, eg have students shown the trend in cation size, and given the correct number of atoms in each molecule?
Lesson one: Using the models to make a class reference sheet, go through the key trends of melting points, plot a graph and annotate it to explain the trend. Students can practise exam-style questions and conduct peer assessment.
Homework: Task two.
Lesson two: Using a similar objective checklist, students peer assess models to consolidate the key ideas of structure and bonding. Use these ideas to annotate and explain a graph showing the melting point trend. Demonstrate how the oxides are formed, and examine what happens when each oxide is added to water.
Homework: Task three.
Lesson three: Students practise writing equations for the reactions of the metal oxides with various acids. Then, using their models, study the structure of the acids. When a base is added, a proton is removed. Students remove protons from their acids to show these steps, then draw the structure of the anions formed. Next, they complete symbol equations for the reactions of non-metal oxides with bases. Discuss the amphoteric nature of aluminium oxide, referring to the cation size trend.
Homework: Task 1. I use an objective checklist of the key ideas for feedback, eg have students shown the trend in cation size, and given the correct number of atoms in each molecule?
Lesson one: Using the models to make a class reference sheet, go through the key trends of melting points, plot a graph and annotate it to explain the trend. Students can practise exam-style questions and conduct peer assessment.
Homework: Task 2.
Lesson two: Using a similar objective checklist, students peer assess models to consolidate the key ideas of structure and bonding. Use these ideas to annotate and explain a graph showing the melting point trend. Demonstrate how the oxides are formed, and examine what happens when each oxide is added to water.
Homework: Task 3.
Lesson three: Students practise writing equations for the reactions of the metal oxides with various acids. Then, using their models, study the structure of the acids. When a base is added, a proton is removed. Students remove protons from their acids to show these steps, then draw the structure of the anions formed. Next, they complete symbol equations for the reactions of non-metal oxides with bases. Discuss the amphoteric nature of aluminium oxide, referring to the cation size trend.
Because students complete homework tasks prior to lessons, I can focus on refining ideas in class, such as trends in ion size, cation–anion interactions and the amphoteric nature of aluminium oxide. Students can also practise writing targeted responses, completing practical work and discussing the intricacies of each trend. This provides some light relief in my lessons, a chance to showcase creativity and some delicious edible models to enjoy!
Because students complete homework tasks prior to lessons, I focus on refining ideas in class, such as trends in ion size, cation–anion interactions and the amphoteric nature of aluminium oxide. Students can also practise writing targeted responses, completing practical work and discussing the intricacies of each trend. This provides some light relief in lessons and a chance to showcase student creativity.


4 readers' comments