


Try these ideas for enhancing practical work and embedding students’ learning
Burning fuels is a great way of introducing energy changes. Candles on birthday cakes, fireworks on 5 November, Formula One racing cars and even the family barbecue provide excellent contexts to engage students and to link experiments with their everyday lives.
Underpinning chemistry and progression
Awareness that chemical change usually involves energy change is first introduced at age 7–11 while looking at properties and change of materials. The next step, at 11–14, is to equip students with a vocabulary they can use to describe these changes. Finally, at 14–16, we provide them with opportunities to measure the energy changes that occur.
| 7–11 years (Key stage 2) | 11–14 (Key stage 3) | 14–16 (Key stage 4) |
|---|---|---|
| Properties and changes of materials (changes associated with burning and the action of acid on bicarbonate of soda) | Exothermic and endothermic chemical change (qualitative) | Measurement of energy changes in chemical reactions (quantitative) |
Developing practical skills and progression
At 11–14 students should have the opportunity to carry out, and see demonstrated, a range of experiments so they share a common experience with teachers. Refer to these experiments while developing appropriate vocabulary and theoretical frameworks to describe what is happening. Experiments should include both exothermic and endothermic changes.
Which sense to trust?
Endothermic changes can feel counterintuitive to some students. They often associate the fizzing they see when citric acid is added to sodium hydrogen carbonate solution with an exothermic change. They are therefore confused when their sense of touch suggests that the reaction is actually endothermic. Asking them which sense provides evidence for energy change is a good way of resolving this issue.
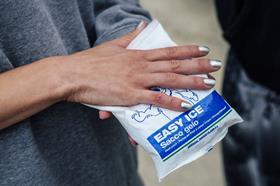
One of the reasons for uncertainty about endothermic reactions may be that students don’t come across them much in their everyday lives. The instant cold packs used for sports injuries can help here. Taking one of these packs apart to reveal that all it contains are crystals of ammonium nitrate and a sachet of water provides a direct link with their own test tube experiment.
The reaction between hydrochloric acid and sodium hydroxide solution (exothermic) is a good one to start with as a change in temperature is the only evidence that a reaction has taken place.
The reaction between hydrochloric acid and sodium hydroxide solution (exothermic) is a good one to start with as a change in temperature is the only evidence that a reaction has taken place (rsc.li/2B8w39V).
Other suitable simple experiments include the reactions between citric acid and sodium hydrogen carbonate solution (endothermic), magnesium powder and copper(II) sulfate solution (exothermic), sulfuric acid and magnesium ribbon (exothermic), and dissolving ammonium nitrate in water (endothermic).
Other suitable simple experiments include the reactions between citric acid and sodium hydrogen carbonate solution (endothermic), magnesium powder and copper(II) sulfate solution (exothermic) and sulfuric acid and magnesium ribbon (exothermic), all described here rsc.li/2B8w39V, and dissolving ammonium nitrate in water (endothermic), rsc.li/2IP0c2g.
Reusable hand warmers are a great example of using exothermic reactions. One common type makes use of the exothermic crystallisation of a supersaturated solution of sodium ethanoate. The pack is recharged by heating it in a pan of boiling water, which dissolves the crystals back into a small volume of water.
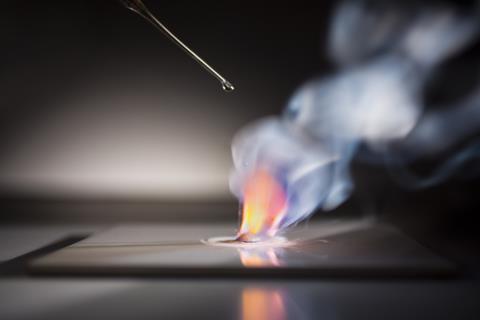
Students can carefully use their hands to get a direct feel for the energy changes without the complication of using a thermometer. Alternatively, they can carry out experiments using drops of solution on a thermometer strip.
Students can carefully use their hands to get a direct feel for the energy changes without the complication of using a thermometer. Alternatively, they can carry out experiments using drops of solution on a thermometer strip (rsc.li/2IP0c2g).
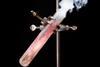
Some energy change demonstrations are very dramatic. The highly exothermic howling jelly baby experiment and the highly endothermic reaction between barium hydroxide and ammonium chloride need to be practised before use in class, but are great ways of making energy changes memorable.
Some energy change demonstrations are very dramatic. The highly exothermic howling jelly baby experiment (rsc.li/2MC4FXe) and the highly endothermic reaction between barium hydroxide and ammonium chloride (rsc.li/35BlWJ0) need to be practised before use in class, but are great ways of making energy changes memorable.
At 14–16, students move from observing energy changes to measuring them. All the exam boards include measuring energy changes in their lists of GCSE practical activities. The skill of using a thermometer to measure temperature is fairly straightforward. What makes these experiments more demanding is the sequence of steps and the dexterity required in burning fuel experiments.
| Specification | Practical |
|---|---|
|
AQA GCSE chemistry (8462) |
Required practical: 4 Investigate the variables that affect temperature change in chemical reactions, eg acid plus alkali |
|
Edexcel GCSE (9-1) chemistry |
9.28C Core practical Investigate the temperature rise produced in a known mass of water by the combustion of the alcohols ethanol, propanol, butanol and pentanol |
|
OCR GCSE (9-1) Gateway chemistry A
OCR GCSE (9-1) Twenty first century science – chemistry B |
Chem PAG 8 Suggested Activity 3 Investigating reaction energetics Chem PAG 8 Suggested Activity 4 Heat of a displacement reaction |
|
WJEC Eduqas GCSE (9-1) chemistry |
Specified practical work: SP2.5 Determination of the amount of energy released by a fuel |
Practical problems and suggested solutions
Measuring energy changes in solution
Quite accurate values can be obtained for energy changes in solution using simple apparatus such as an expanded polystyrene coffee cup. These cups are easily knocked over so it is a good idea to support them in a glass beaker. A lid on the cup with a hole for a thermometer also helps as it will cut down heat loss from the surface of the liquid.
Simple experiments such as adding acid to alkali, reactive metal to acid or dissolving a salt in water are ideal opportunities for students to devise their procedure for themselves so that they learn not only what steps to take but think through why they carry them out in a particular sequence. Asking students questions about what amounts of reactants to use and why stirring is helpful can provide useful scaffolding.
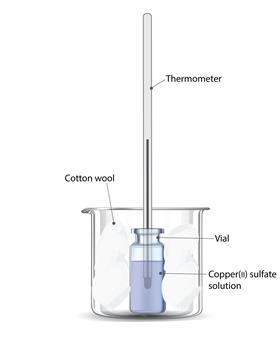
Energy changes of reactions in solution can also be measured with a reduced scale technique using a glass vial surrounded by cotton wool as an insulating material. Targeted questions can be used to bring out the advantages of this method in terms of reduced amount of materials to use and dispose of.
Measuring energy changes when fuels are burned
A popular experiment uses different alcohols in spirit burners to heat up water in a glass beaker, conical flask or metal calorimeter.

It is better to use a different spirit burner for each alcohol rather than using the same burner for different alcohols as this avoids the need for burners to be emptied and refilled. Take care to keep the stock bottles of alcohols well away from the area where the burners are used and to make sure that the burners are allowed to cool down after use before adding more fuel.
This type of experiment provides an opportunity to ask students rich questions that will really probe their understanding:
- What is the black deposit that forms on the underside of the calorimeter and how might it affect the accuracy of the experiment?
The deposit is soot, which suggests incomplete combustion of the fuel has taken place. This will reduce the value of the energy change.
- Why is it a good idea to weigh the spirit burner as soon as the flame is extinguished?
To minimise the loss of fuel through evaporation before the burner is reweighed.
- Why is it better to compare the mass of different fuels that have to be burned to produce the same temperature rise rather than simply burning different fuels for the same time?
So that we are comparing the same amount of heat transferred to the water each time.
- What assumption do we make when comparing the energy changes associated with burning different alcohols?
That the proportion of the energy from burning the fuel that is used to heat up the water in the calorimeter is the same each time.
- What steps could we take to reduce the heat losses?
Shield the flame using Bunsen burner mats and use a copper calorimeter with a lid instead of a glass flask.
You could choose to use a flipped learning technique in which students try out a fuel burning simulation before carrying out their own experiment.
You could choose to use a flipped learning technique in which students try out a fuel burning simulation (rsc.li/2oEDdQJ) before carrying out their own experiment.
Interpreting information from energy change experiments
At 14–16 students should be encouraged to use their graphical and arithmetic skills to make sense of their measurements.
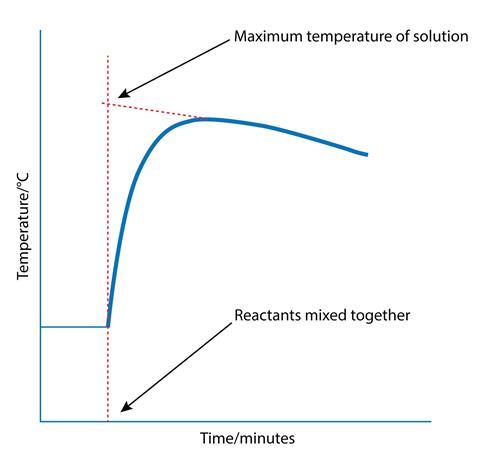
Although an expanded polystyrene cup reduces heat losses to the surrounding air in an exothermic reaction, it does not eliminate them – so the maximum temperature recorded will be slightly lower than it would be without the heat loss. One way to get round this problem is to take temperature measurements of the solution at regular intervals from just before the reactants are mixed until after the temperature begins to fall. A graph of temperature plotted against time can be used to estimate what the maximum temperature would have been if there had been no energy loss to the air.
A similar technique can be used to find the end point in an acid–base titration as described in Monitoring reactions.
A similar technique can be used to find the end point in an acid–base titration as described in Monitoring reactions (rsc.li/2Bcda5W).
When burning different alcohols, students can compare the mass of fuel needed to produce the same temperature change. They can also calculate a value for the energy transferred by using the equation:
Energy (J) = mass of water heated (g) x temperature change (°C) x 4.2 (specific heat capacity of water)
This value can be converted into energy per gram or energy per mole to lead to an interesting discussion about which value is most useful.
Derek Denby is a retired chemistry teacher now working as an independent science education consultant


2 readers' comments