


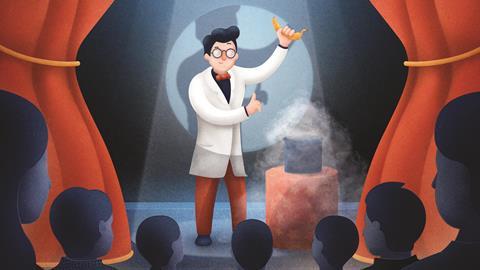
Neil Monteiro shows how taking lessons from magicians can make your demos come alive
Science and magic don’t obviously have much in common. One is about the rational investigation of the physical world while the other is about dazzling people with trickery and, for no obvious reason, pulling birds, handkerchiefs and other items out of thin air. However, as most science teachers know, even the most mundane classroom science demonstration has a little magical flair to it. So much so that in my work as a professional science performer, the audience very often refer to my demonstrations as ‘tricks’.
Though when you think about it, the common ground is clear: both science demonstrations and magic tricks aim to surprise. No demonstration would be impressive if everyone expected the outcome. Though it’s important for young chemists to gain an understanding of the dissolution of ionic compounds, you wouldn’t drop a cube of sugar into water, flourish a teaspoon and exclaim, ‘Ta-dah!’ Similarly, elephant’s toothpaste, the most classic of all chemistry demonstrations, wouldn’t be as exciting if the bubbles didn’t keep coming out to ridiculous proportions. The fact that it’s unexpected is what makes it impressive.
And it isn’t just the element of surprise that demos and tricks have in common. The whole structure of a demonstration – the build-up of anticipation, the displaying of simple props, statements like ‘this is just ordinary water …’ – is all in absolute parallel with the setup of a magic trick. The end reactions from your students are the same too, with exclamations of surprise and awe and ‘no way!’ all common after a good demonstration.
These reactions are exactly what magicians try to craft with their tricks. Magicians sometimes spend years refining tricks, changing the odd word or gesture in a routine to maximise the impact it will have. And this is exactly where they can help us, because many of their performance techniques can be directly used in science demonstrations.
Why should we bother? Although we’re used to thinking of science demonstrations as educational, they’re also introductions to the wonder and excitement of science – similar to real discoveries. Demos are the best tool we have for grabbing attention and creating a sense of curiosity and fascination, all while explaining complicated concepts. The bigger the impact a demonstration has, the more likely your students are going to want to know more.
So if you’re wondering why one of your demonstrations fell flat, or you simply want to add that little extra something to really get your students talking, here is a short guide on how to bring a little more magic into your lessons.
Step 1: identify the effect
This is the most basic step to improve a trick. When magicians talk about effect, they simply mean what the audience sees. In the case of a trick, this might be that an apple is magically changed into an orange. Crucially, this is not about how the apple is changed into an orange but about what is apparent to the audience. In his book, Designing miracles, the magician Darwin Ortiz uses the terms ‘initial condition’ and ‘final condition’ to refer to the two stages of a trick – the initial condition is that there’s an apple, the final condition is that now it’s an orange. The idea is once a magician understands what the trick is really about, it becomes much easier to improve it.
How you can use it
Simply put, before you can improve a demo you need to understand the effect. In a colour-change demonstration, you might be using an acid-to-base reaction, but what your students actually see is a liquid turns from red to blue. So you as a demonstrator need to make sure the red–blue change is visible, interesting and that it fits with the point you’re trying to make. The demo sets them up for the learning that comes after.
Step 2: make it snappy
Magicians talk about the ‘set-up’ and the ‘reveal’ – for example, showing the apple and then revealing the orange. The longer it takes to get from A to B, the less immediately impressive the trick is. There’s a famous trick where a magician is locked in a box and the assistant stands on top it and throws a curtain in front of them both, and in the second it takes for the curtain to fall, they’ve swapped places. If this trick took even a few seconds longer it would clearly be less spectacular. A trick must be snappy.
How you can use it
This is really about picking the right demos. Disappearing ink for example, giving a slow fade over a minute, is often unexciting compared to other demos that happen in a flash, like the well-known ‘chemical clock’. This isn’t to say all demonstrations are better when performed quickly – making towers out of crystallising sodium acetate is beautiful when seen slowly, for example – but it’s a good thing to try if your demo isn’t creating the wow effect you were hoping for.

Step 3: increase the distance
Increasing the distance a trick happens over, or the size of the trick in general, is another simple but effective technique. If an object ‘teleports’ from one hand to another it looks pretty remarkable, but if it goes from the magician on stage to a volunteer at the back of the theatre, it looks even more so, even though the trick itself is basically the same. Increasing the distance can have a big effect on the impact of a trick.
How you can use it
This trick is most useful for demos that involve more than just a single flask. For example, when demonstrating heat expansion of a gas, I like to fire a small foam ball out of a plastic tube. In terms of the science, it doesn’t matter how far the ball flies but it makes a lot of difference to the students watching it, especially if it goes all the way to the back of the hall. Increasing the distance is particularly helpful when doing demonstrations for a larger audience.
Step 4: create a conceptual jump
A trick where an apple transforms into an orange may not seem so striking, but what about an apple changing to an apple pie? Or an apple pie transforming into a pastry chef? The mechanics of the trick might be the same but the change in presentation makes a huge difference to its impact. The bigger the difference in the audience’s mind, the more of a reaction the trick will get. As with the other techniques, the magician is trying to make the trick seem even more impossible.
How you can use it
Making that conceptual jump bigger is hugely important for a science demonstration to work. Demos are fantastic for showing how our current beliefs can be completely wrong, and those gasps of, ‘no way!’ are almost always followed by, ‘but how?’ Lighting up a fluorescent tube with a plasma ball is a great example – in the minds of students (and most adults) a light simply can’t work unless it’s plugged in.
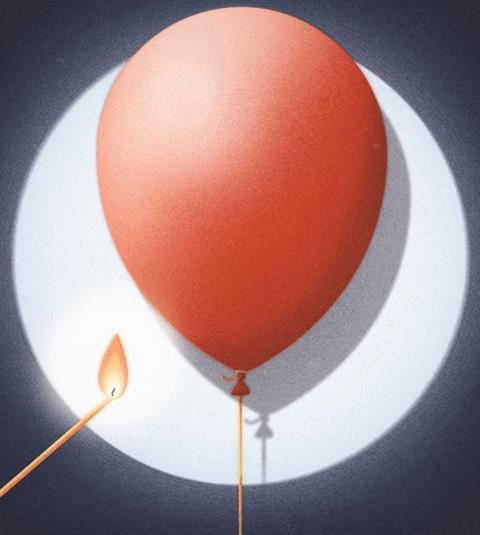
You can also use this idea to improve on classic demos. Think of demonstrating an exploding hydrogen/oxygen balloon: if you use a big balloon you build expectation of a loud noise but a tiny balloon can also make a huge bang – and that would certainly be more surprising.
Step 5: use multiple outs
If you’ve ever seen a magic trick that defied all explanation, the chances are you were witness to an illusion using what magicians call ‘multiple outs’. Imagine a magician secretly prepares a prediction and then asks for someone to randomly name a playing card. There’s a 1 in 52 chance the magician gets it right by pure chance and can reveal the prediction and end the trick there. But, if the magician doesn’t get lucky, they can have a routine ready that means the trick goes in a different direction and the audience would never know the difference. This means you can try a trick that’s unreliable without having to worry if it doesn’t come off.
How you can use it
Nothing is worse for a science teacher than a demonstration that doesn’t work. Not only is it a missed opportunity to enthuse, it’s ammunition for those students who already think science is uninteresting. If you need to show a demo but know it’s unreliable, the multiple outs technique can be a lifesaver. I use it when demonstrating expanding gases in combustion mentioned earlier – with a plastic tube, flammable gas and a foam ball. The first time I light the gas in the tube, I leave the ball out – if a big flame is visible, everyone likes it and I move on. If it isn’t, I add the foam ball into the demo, mention that we need it to make the effect visible and we do it again. That gives me two chances at the same demo but nobody watching would realise it didn’t go to plan the first time.
Step 6: make it convincing
Magicians are tasked with a difficult job: to convince us, just for a moment, that the impossible is possible – and just happened. This is traditionally done by handing around equipment for people to inspect, theatrically tapping on things to prove they’re solid and by proclaiming ‘This is an ordinary coin, just an ordinary coin …’ But it also includes a lot more subtle techniques. For example, card magicians make a habit of quietly shuffling a deck even when the trick doesn’t require them to. If they drew attention to that, it would arouse suspicions but by doing it subtly, the convincing shuffle only increases the ‘wow’ during the reveal of the trick.
How you can use it
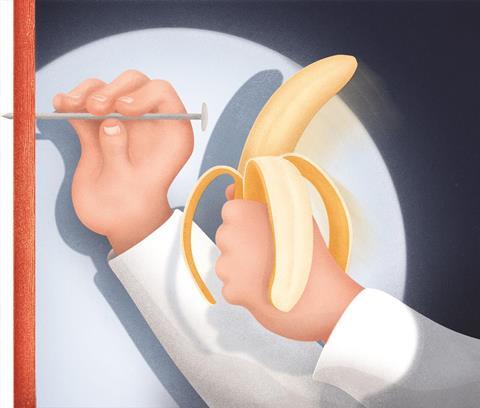
The stronger the students believe the initial condition is real, the more immediately amazing it is to have those expectations confounded. Think about the imploding coke can demonstration where you pour in a little boiling water and then seal the can. This is impressive even if you use prepared cans but it’s even more so if you can borrow one that a student has just emptied. The demo is the same but it now has that bit more impact. The same thing is true of the ‘banana hammer’ demonstration with liquid nitrogen – anyone will be amazed by this but it’s even more impressive if you take a bite out of the banana before you freeze it.
Step 7: include a kicker
Kickers are a way to get a bit more value out of a trick, like an extra reveal or surprise. For example, when a rabbit is pulled from a hat the audience applauds – but then, the magician makes a carrot appear too and gives it to the rabbit. Making the rabbit appear is the main event, the climax of the trick, and bringing out the carrot is a kicker designed to get an extra reaction from the audience.
How you can use it
There are some really effective uses of kickers in existing demonstrations. My favourite is in the ‘oil and glass’ demonstration, where pyrex glass disappears in vegetable oil. After you show the glass disappearing in a beaker of oil, reach in and pull out several other glass objects hidden in there the whole time. However, it can be a little distracting from your main point if kickers are used at every demo, so they should be used sparingly to create the maximum effect.
There are many lessons that can be learned from magic, theatre and other creative industries, and these are just some of techniques you can use to enhance your classroom demonstrations. Ultimately, none of these should supplant the teaching of concepts, but a demo is not just about communicating an idea, it’s about conveying the sense of awe and wonder that should always accompany observing the world as a scientist. In the end, it’s all about finding the magic.
Neil Monteiro is a science communicator and presenter based in the UK


2 readers' comments