


David Paterson suggests ideas, activities and resources for your classroom

How does the knowledge of the fundamental states of matter help us make better ice cream?
Simply mixing cream, sugar and egg yolk and sticking it in the freezer isn’t enough. Careful control of the mixing and freezing process leads to a material with all three states of matter – a foam and an oil-in-water emulsion. The taste of ice cream comes partially from your taste buds on your tongue, but also due to evaporation of volatile compounds reaching your smell receptors. Ice cream really does taste better on a warm day!
Download this
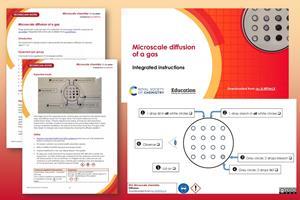
A simple microscale diffusion practical. Resources include:
- Technician notes as pdf and MS Word
- Integrated instructions as pdf and MS PowerPoint
- Integrated instructions (Welsh) as pdf and MS PowerPoint
What students need to know
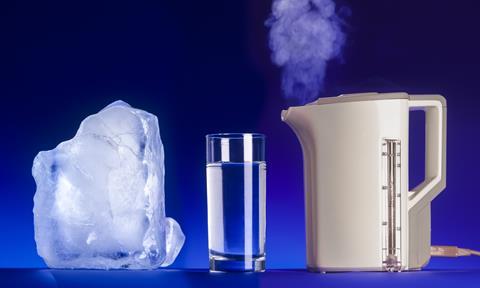
Students will have studied the types and properties of matter during primary education. They will have investigated various different materials, classifying them as solids, liquids and gases. They will have looked at reversible reactions, including freezing/melting and boiling/condensing. These macroscopic observations and explanations need to be linked to the microscopic world of the particle using ‘particle theory’.
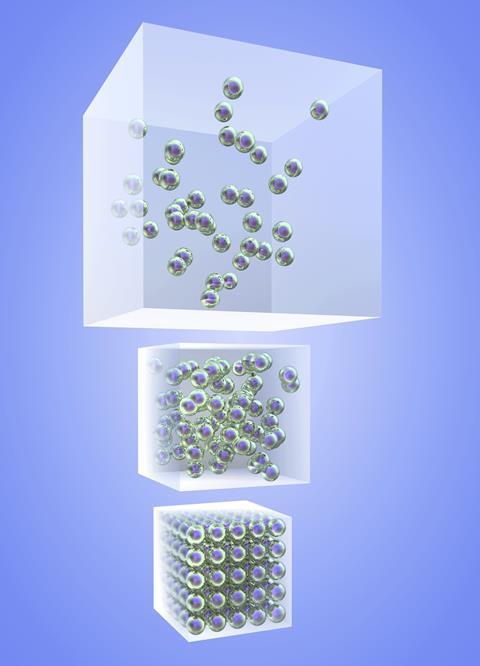
The particle (or kinetic) theory of matter can be summarised as:
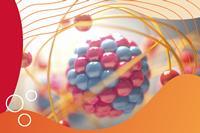
- All matter is formed of tiny particles.
- The particles are constantly randomly moving about.
- The particles can be arranged regularly or randomly.
- The particles are held together by weak or strong forces.
- As temperature increases, the particles move faster.
There is a strong overlap between this area in chemistry and physics. Look at where it is scheduled in your school’s schemes of work to see whether you will be teaching it for the first time, or consolidating the knowledge.
Ideas for your classroom
Hands-on demonstrations, simulations and practical work provide lots of opportunities for your students to understand the dynamic nature of particles. Check with your physics department to see if they have a kinetic theory model (eg SciChem XPG050011; Timstar SI68190). These use ball bearings to model the particles. A vibrating base ‘energises’ the particles. By increasing the vibration speed, you can model solid, liquid and gas.
Place a few drops of a perfume on a watch glass and ask the students to raise their hands when they can smell it
Freely available online simulations, such as the pHET States of matter, allow you to demonstrate the effects of heating and cooling substances. Students can see state changes, and relate this to movement and arrangement of the particles. Consider allowing the students to investigate the simulations for themselves, either in class or for homework; this worksheet could be suitable. An alternative paper-based activity is Particle model cards from the Royal Society of Chemistry.
Diffusion of particles provides many useful contexts to help students make the link between the macroscopic world and the sub-microscopic. Start with simple demonstrations such as placing a few drops of a perfume on a watch glass and ask the students to raise their hands when they can smell it. They should observe a wave of hands going up as the fragrance particles spread from the watch glass.
This can be followed with diffusion of nitrogen dioxide in gas jars. In this demonstration, NO2 is synthesised by mixing copper turnings and concentrated nitric acid in one gas jar. A second air-filled jar is then placed over the top, and the NO2 allowed to diffuse into it. Your students will observe the dark brown vapour moving into the upper air-filled jar. Ask them to consolidate their observations with particle diagrams showing the before, during and after. They should annotate the movement and mixing of nitrogen dioxide and air particles.
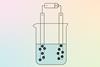
A commonly used demonstration is soaking mineral wool separately in concentrated hydrochloric acid and concentrated ammonia solution, and placing these at either end of a large glass tube. However this can be fiddly to set up and requires a fume hood.
A good alternative is a microscale diffusion practical, with all the chemistry happening on a plastic sheet under a petri dish. Students first make up an array of iodide/starch drops on a plastic sheet. Second, they mix a couple of drops of acid and bleach to synthesise a small volume of chlorine. Finally, the whole arrangement is covered in a petri dish to contain the chlorine and allow it to diffuse to the iodide/starch drops. Your students will observe the drops darkening as the iodine is displaced from solution and forms the blue/black iodine-starch complex. They can set up, carry out and clear away the apparatus inside 15 minutes, leaving plenty of time for discussions and explanations. Download the technician notes and integrated instructions from the box above.
Common misconceptions
Misconceptions in this topic are common and can be deep-seated. This isn’t surprising given the abstract ideas we are trying to help students grasp. Use the Best Evidence in Science Teaching project resources to help expose these misconceptions – the Topic 1, Key concept 1 Substance will be useful for this topic.
Common misconceptions include:
- Matter is continuous, rather than being formed from discrete particles – everyday experience reinforces this – solids ‘feel’ solid and liquids stay together in drops even if they are sprayed. Discussing gases can be a helpful way in to particles, but as they ‘disappear’, many students think gases aren’t properly there.
- Space between particles is filled with air – even when students accept the idea of matter being made of particles, the space between particles can still be considered as air. Everyday life again creates a false analogy with solid and liquid objects being separated from each other by the air we breathe.
- Forces are responsible for all particle movement – this links with a common misconception from physics, whereby force is considered required for all movements. Students struggle with the idea that a particle keeps moving once it starts. Everyday experiences, such as a hockey ball rolling to a stop once hit, create this false analogy.
- Particles change state – eg when ice melts it is the ice particles melting to form water particles, rather than the substance changing state due to the change in energy and position of the particles relative to each other.
- Atoms and cells are about the same size – this isn’t helped by chemists and biologists using ‘nucleus’ to describe the centre of our respective fundamental building blocks. Discussing relative scales of objects can help – eg a human cell is 100,000x smaller than a human, while an atom is 100,000x smaller than a human cell. Videos such as Powers of ten can also help.
Formative assessment
As the kinetic theory is one of the key models underpinning much of chemistry, discuss it regularly, and give the students plenty of opportunities to create artefacts to help them express and consolidate their understanding of the model. Drawing posters showing the particle arrangement of solids, liquids and gases, surrounded by notations of the properties is useful. Success criteria could be displayed for the students to peer assess each other’s work, identifying areas for improvement. If you have a visualiser available, display high-quality examples to model the expectations for the class.
The RSC Assessment for Learning suite of resources contains a useful document discussing many example of substances in different states. You may need to select carefully, as there are examples of compounds and mixtures included, along with particles shown as molecules. However, identifying early on that particles are being modelled as a simple circle is useful in the general discussion of use of models in learning about science.
Progression to 14–16
The structure of matter at the sub-microscopic level, and the forces between particles, underlies the explanation of macroscopic properties. During 11–14, students gain some appreciation of the nature of the particles (atoms, ions, molecules). At 14–16, you will expand on how these different particles are formed and how this affects the nature of the forces between them. Students will need to identify the similarities and differences between ionic, covalent and metallic bonding, and weak intermolecular forces.
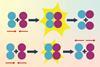
Another key area is reaction kinetics – collision theory is predicated on an understanding that particles collide, and the models used at this level are very reminiscent of the particle model.
Finally, there is strong overlap between chemistry and physics in this area of study. Changes of state are discussed in much greater depth in physics, looking at the internal energy of substances, delineating kinetic and potential energies. The two plateaus on the heating/cooling curves of substances are much more explicable when this has been learned.
Take-home points
- Kinetic theory describes the position and movement of particles in substances.
- Students commonly equate the size of atoms with that of cells – take time to help them visualise the orders of magnitude involved.
- Make use of simple demonstrations and practical work to help your students link between the macroscopic and sub-microscopic.
- Kinetic theory is built on throughout 14–16, and allows structure and bonding to be explicable.
David Paterson is a chemistry/physics teacher at Aldenham School, Elstree. He tweets @dave2004b


No comments yet