


-
Download this
Technician notes as MS Word or pdf to help set up and do this experiment.
View and download more Exhibition chemistry demonstrations
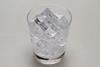
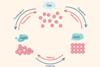
We take water for granted despite being surrounded by the stuff. It’s one of the universe’s strangest materials. We have its bizarre solid density, anomalous melting and boiling points, and, of course, its strangely high heat capacity and heats of fusion and vaporisation. Although in most places our atmosphere is full of water vapour, as an odourless, colourless gas, students rarely get to see what water is capable of when neither solid nor liquid. Many times when students might think they’re looking at steam, they are in fact looking at liquid water, such as the mist droplets rising from the spout of a boiling kettle that we commonly refer to as ‘steam’. These misattributions of the properties of the liquid to those of the gas can lead to some startling demonstrations – such as the fact that, as a gas, water has the capacity to start, rather than extinguish, a fire.
Download this
Download the technician notes as MS Word or pdf: rsc.li/XXX
Kit
- Eye protection
- Thermally-resistant gloves (optional)
- 250 cm3 borosilicate conical flask or round-bottomed flask with a bung
- Glass tubing (100 cm)
- Boiling chips / anti-bumping granules
- 60–100 cm of copper tubing with internal diameter of approx. 5 mm, wound into a coil approx. 5 cm across
- 2 Bunsen burners or a hotplate and a Bunsen
- Clamp stand and clamp
- Wooden peg-style test tube holder
Preparation
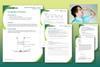
You will need to thread two tubes through a bung which fits the neck of your boiling flask:
- One will be a safety valve made of glass tubing at least 60 cm in length (preferably up to 1 m). The end of the tubing should reach low enough to be submerged in the boiling water during the demonstration. See the ASE’s Safeguards in the School Laboratory (12th edition, section 8.1) or CLEAPSS GL151 for directions on safely passing glass tubing through a bung.
- The other will be either the end of the coil itself or a short section of L-shaped glass tubing to connect to the copper coil. If using glass tubing to connect to the copper coil, a piece of rubber or silicone tubing can be used as a connector, but the end of the glass tubing must butt up to the copper tubing exactly to prevent a blockage from occurring should the rubber melt.
If using glass tubing to connect to your coil, you may need to support the coil at the joint with a clamp.
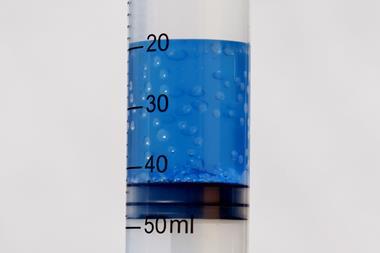
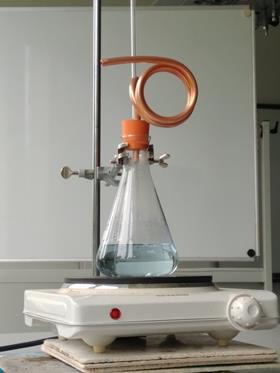
Place the boiling flask over a Bunsen or on a hot plate and add approximately 100 cm3 of water and some boiling chips. Ensure the end of the safety valve is submerged in the water.
In front of the class
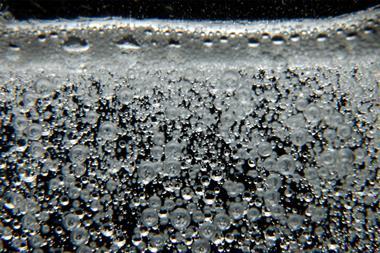
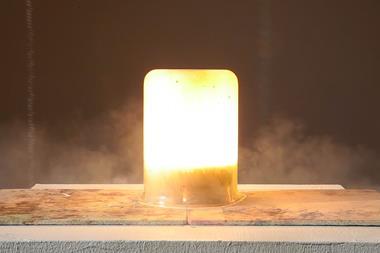
Wear eye protection. Ensure the exhaust from the copper tubing is facing neither the audience nor the demonstrator. Heat the water in the flask until ‘steam’ is seen coming from the end of the copper tube. At all times watch the level of liquid in the safety valve tube and reduce the flask heating if there is any risk of the hot liquid rising out of the top.
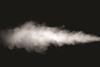
The ‘steam’ is in fact a mist of condensed water droplets. You could at this point show that a piece of paper or match does not light, but rather dampens, when held in a test tube holder approximately 1 cm from the exhaust of the copper tube. Keep your hand by the side of (rather than underneath) the exhaust to prevent drops of very hot water from falling on you.
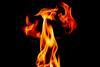
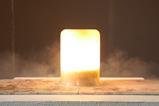
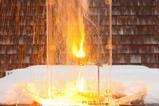
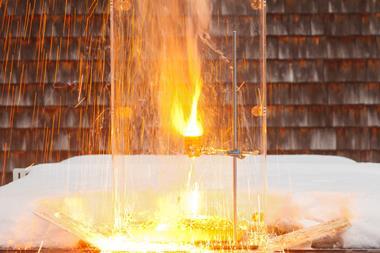
While continuing to heat the boiling flask, use a separate Bunsen burner to heat the copper tubing directly. The mist of droplets will disappear as the temperature of the water rises above 100°C to reveal the true invisible steam. When fresh (dry) paper or a match is introduced, the paper will char and the match will ignite in the steam.
Safety
- This is a teacher demonstration only. The invisible steam presents a heat hazard and drips of very hot water can fall from the end of the copper tubing – keep hands well away.
- Although the steam will cool rapidly away from the copper tubing, the coil itself may remain dangerously hot for some time after the demonstration.
- Carefully watch any connections with the copper tubing to ensure no blockage occurs due to melting rubber.
- If you have one, you could use a steam can for this demonstration, although this does prevent students from seeing the boiling water inside.
- CLEAPSS members should refer to SRA021 – Using super-heated steam to ignite a match and char paper.
Teaching goal
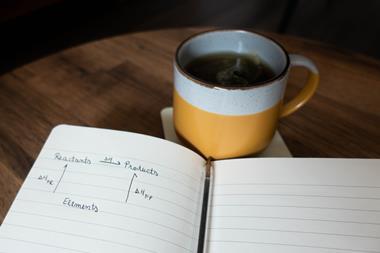
When water is used to extinguish a fire, we rely upon the principle that any additional energy supplied to the water at 100°C will go towards overcoming its enormous latent heat of vaporisation (2256 kJ kg-1) rather than raising its temperature.
The ignition point of paper is approximately 230°C for paper and 300°C for wood, and a typical wood fire will burn at approximately 600°C. Assuming a heat capacity of around 1.5 kJ kg-1 K-1 for these materials, it can be shown that around 450 kJ of energy per kilogram of fuel would need to be removed from a fire to drop it to below the temperature at which it would burn. So the latent heat alone for 1 kg of water would be sufficient to extinguish around 5 kg of burning material before we even consider its heat capacity.
Normally when we see water heated to boiling, the vapours escape the source of heat and never get the chance to further increase their thermal energy. But in this demonstration we see that additional heating can easily increase the temperature of the steam to the point at which it is hot enough to reach the ignition temperature for the match.
Watch this
Watch the video on the Education in Chemistry website: rsc.li/xxxxxxx
Downloads
Technician notes - superheated steam
Handout | PDF, Size 90.22 kbTechnician notes - superheated steam
Editable handout | Word, Size 0.11 mb
- Prepare(2)
 Resource
States of matter | Beyond appearances
Deconstruct misconceptions learners may have around states of matter and understand what this means for your teaching
 Course
Particle and atomic models | Self-led course
Strengthen your subject knowledge and discover teaching strategies to develop your learners’ understanding of the particle model and atomic structure
- Deliver(6)
 Poster
Everything you need to teach states of matter
Particle diagrams, changes of state and their properties – perfect for your 11–14 year-old learners
 Resource
States of matter | Developing understanding | 11–14 years
Encourage learners to deepen their understanding of states of matter and how they are represented at different conceptual levels of thinking
 Resource
States of matter | Johnstone’s triangle worksheets | 11–14 years
Use this worksheet to develop learners’ understanding of states of matter, including a teacher demonstration
 Resource
States of matter | Structure strip | 11–14 years
Support learners to recall and write about the properties of solids, liquids and gases
 Exhibition chemistry
Demonstrate changes of state using volume differences
Use this demonstration to reinforce the differences between states of matter with your 11–14 learners
 Demonstration
The sublimation of air freshener | 11–14 years
Use this experiment to demonstrate sublimation, showing how solid air freshener changes directly from a solid to a gas. Includes kit list and safety instructions.
- Literacy(3)
 Resource
Particle model | Key terms support | 11–14
Language support pack for particle model, with key terms list, accessible glossary, Frayer models and unscrambling definitions
 Resource
Particle model | Reading comprehension | 11–14 years
Use this reading comprehension based on a real science research news story to develop literacy skills and confidence
 Resource
Particle model | Structured talk | 11–14 years
In this speaking and listening task learners work together to build word bridges, building and sharing understanding by applying the particle model
- Enrich(8)
 Class experiment
Viscosity | Classic chemistry experiments | 11–14 years
Compare the viscosity of thick and thin liquids by measuring the time is takes for a bubble to move through them
 Games and puzzles
States of matter 1 | Gridlocks puzzle | 11–14 years
Reinforce your students’ understanding of states of matter using these sudoku-style puzzles, with printable worksheets and answers
 Games and puzzles
States of matter 2 | Gridlocks puzzle | 11–14 years
Reinforce your students’ understanding of states of matter using these sudoku-style puzzles, with printable worksheets and answers
 Class experiment
Particles in motion? | Classic chemistry experiments | 11–14 years
Explore the movement of gas particles by reacting calcium carbonate with hydrochloric acid and testing with limewater
 Job profile
Scientist, food and pharmaceuticals
Taryn uses scientific instruments to test our food and medicines and make sure they are safe
currently reading
 Exhibition chemistry
Superheated steam
Ready to start a fire with water? Use this demo to teach students about enthalpy and properties of water
 Job profile
Laboratory analyst and higher degree apprentice, water
Joseph helps ensure there is clean, safe, water for 15 million people in the UK whilst studying towards his chemistry degree


1 Reader's comment