


Teach your students to recognise the dangers that can exist in the laboratory and how to combat them
Mae’r erthygl hon ar gael yn Gymraeg

Cael y fersiwn Gymraeg.
Risk assessment is a process we all do in our everyday lives, often without realising.
When we cross a road, we make a risk assessment – identifying the hazard of crossing in traffic, the harm of being hit by a vehicle, the severity of that harm. We identify control measures of looking for traffic, selecting safer places to cross, moving across the road quickly.
All this might happen very quickly in our minds, so we don’t see it as a process. This comes from having internalised our training when we were younger, and applying the control measures frequently.
Students need to develop knowledge and skills in risk assessment
When we carry out practical work, we are risk assessing both in the situation and, more deliberately and formally, in our planning. As part of their scientific education, students need to develop knowledge and skills in risk assessment. This starts from their first day in the laboratory, right up to self-directed extended investigation. Knowing about hazards, risks and control measures is key to keeping themselves and others safe.
Exam specifications require students to be competent and safe at handling hazardous substances and apparatus, and to carry out experimental procedures with minimised risk. In their future study and careers, they will be in a world where health and safety procedures are a prominent part of their day-to-day lives.
Download this
Student risk assessment worksheets, for age range 14–16
Guide learners to recognise hazards, evaluate risks and identify control measures in a common core practical.
Download the resources from the Education in Chemistry website: rsc.li/3Y9tlcN
Start simply
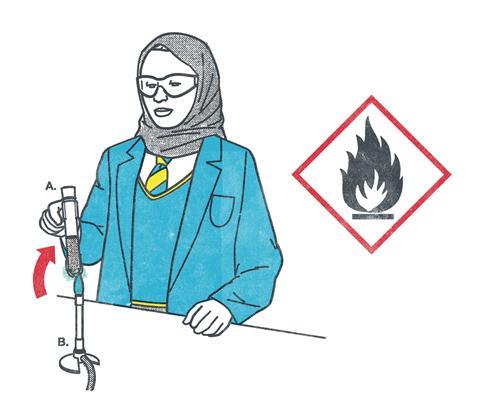
Start your students’ education with a fundamental piece of kit – the Bunsen burner. Discuss the safety features. Train students in setting up, using and clearing away the equipment. Guide them in identifying the hazards involved, and the control measures that we put in place to reduce the risks, and keep them and others safe. Provide students with a copy of Student safety sheet SSS092, one of a range of information sheets from CLEAPSS written specifically for students. Teachers in Scotland can also access resources from SSERC; their website has a number of activity sheets with risk assessments.
As students develop their competencies in the laboratory, you use further SSSs to provide additional support and reference. Information on heating non-flammable and flammable substances, transferring solids and liquids, and handling hot liquids in beakers is available. Glossaries, waste disposal information and details of CLP (classification, labelling and packaging) and other safety pictograms are included and can be used as ready reference material in the classroom.
Build knowledge and experience
As they progress through their education, give students the opportunity to assess risk more formally. Start with pre-practical activities of looking up the hazard information of substances that will be used in the upcoming practical. For example, SSS020 will quickly show students that hydrochloric acid is available at a range of concentrations, with hazards running from ‘DANGER: Corrosive’ to ‘Currently not classified as hazardous’. Discuss with your students the importance of assessing the risk based on what they will actually be using, rather than just imposing the strictest set of control measures possible.
When students start carrying out more detailed investigative work, use a risk assessment pro forma to help guide their thinking and decisions. Three different formats are available in the SSS pack, as well as an exemplar based on the common practical making copper sulfate crystals.
Recommended reading and resources
- Stay on top of your own risk assessments by risk assessing your practicals.
- Emphasise risk and working safely to your 14–16 students with this practical video on preparing a soluble salt.
- Show students how important understanding and mitigating risk is in the real world by sharing job profiles from Nicholas, a toxicologist and Tim, a computational toxicologist.
- Ensure you’re familiar with the differences between safety goggles and spectacles and how you can adapt practicals when goggles aren’t available.
- Stay on top of your own risk assessments by risk assessing your practicals: rsc.li/3w9G0AD
- Emphasise risk and working safely to your 14–16 students with a video on preparing a soluble salt practical: rsc.li/3WoCP2u
- Show students how important understanding and mitigating risk is in the real world by sharing job profiels from a toxicologist and a computational toxicologist: rsc.li/3ZJ6PZW; rsc.li/3WleRW1
Teachers remain responsible for the final risk assessment in our labs. However, involving students in the processes will make them think more carefully about what they are doing. Their learning in science lessons can also feed into other areas of study.
One final aspect of good risk assessment is to consider what happens in an emergency. As adults, we tend to respond better to emergencies, due to our training and experience. Help train your students by discussing situations that can occur, and how best to respond. The emergency actions document (SSS096b) provides a useful summary.
Risk assessment is a critical part of carrying out practical work in the chemistry classroom. By involving students in the process, by developing their knowledge and skills of hazards and risks, we prepare them better for activities both in and out of the science lab. Risk assessment helps our students to stay safe.

This article is part of our Teaching science skills series, bringing together strategies and classroom activities to help your learners develop essential scientific skills, from literacy to risk assessment and more.


No comments yet