


We’ve got just the ticket to squeeze the most out of every minute of your practical lessons
Time in the laboratory is valuable, particularly as we return to classrooms after lockdown. With this in mind, here are three tried-and-tested mechanisms for arranging practicals differently to help you squeeze the most out of every precious minute.
Time in the laboratory is valuable. With this in mind, here are three tried-and-tested mechanisms for arranging practicals differently to help you squeeze the most out of every precious minute.
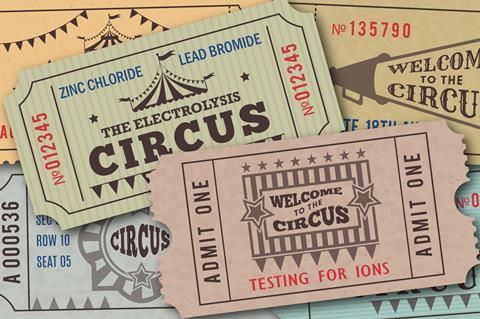
1. Practical circus
One of the most popular strategies for maximising the efficiency of practical time is a ‘circus’. Different stations are set up around the lab, which students move between, carrying out a practical at each location. These are often very short mini-practicals, and the students will need to note down their findings and answer questions about the chemistry they are observing.
In terms of the sorts of activities to include, at 14–16, determining the products of the electrolysis reactions of different solutions makes a great circus activity as it is fiddly for students to set up the reactions themselves. I recommend demonstrating the electrolysis of molten zinc chloride or lead bromide prior to the circus. After the circus, ask students to deduce (with some scaffolding) the rules about which products are formed. A testing for ions activity also works well for students gathering observational data and reduces washing-up for the technician. I usually follow this by giving students a few unknown compounds to identify using their data. You can also try this pre-made set on the properties of gases for 16–18.
The biggest benefit of the circus approach is efficiency with apparatus and students’ time setting up experiments. The more stations, the less time students will have at each one, so consider this when designing the circus. It also tends to fall apart if the time required at each station is uneven, so check the activities all take roughly the same length of time; if one is too short, add a tricky question to that station to even them out.
I highly recommend that each station has a laminated card which identifies it clearly (matching the students’ worksheet) and includes instructions on how to clean and reset the station for the next group. If you have excess stations, students can move at their own pace; if not, give groups a one-minute warning for resetting the station, then rotate.
2. Simultaneous experiments
Sometimes a lesson will involve two linked practicals that you want students to complete. For instance, when studying conservation of mass you may want students to measure the increase of mass for the combustion of magnesium and the decrease in mass for the reaction of hydrochloric acid and calcium carbonate, and then compare their findings to draw out theoretical ideas. When introducing equilibria you may wish students to observe the heating of ammonium chloride and of hydrated copper(II) sulfate before adding water to the anhydrous product.
In these cases splitting the class into two, with one half doing each reaction before swapping over, can maximise the efficient use of apparatus. It also clearly designates each space for carrying out one particular experiment, reducing cognitive load compared to having both running at the same table.
This mechanism works particularly well when the two practicals both shed light on the same phenomenon from different perspectives, using a worksheet which scaffolds comparison between the two. For example, using a column for each set of observations can help to focus students on the pertinent information that the practical is foregrounding.
3. Expertise jigsaw
A modification for longer practicals is to have pairs of students working on one experiment from a set, developing their expertise ready to present, demonstrate or peer-teach their practical – and then piece together their knowledge with the rest of the class.
For example, students could be assigned to one of the methods for measuring the rate of a reaction which produces a gas (gas syringe, collecting over water, decrease in mass); one of three/four investigations which draws on their mole calculations; or different enthalpy experiments (a thermometric titration, enthalpy of combustion of alcohols, enthalpy of reaction for a displacement reaction).
After the experiment, students present their method and findings either to the class or a small group of students. For class presentations, students could take photographs of the practical and their graph for inclusion in the presentation; they could even make mini research posters (using a scaffold if necessary). For small groups, including representatives from each experiment, pairs might demonstrate the practical they carried out, their observations and findings, and any practical techniques.
While students engage in really deep thinking about the practical they become ‘expert’ in, they may feel less confident about the practicals they observed. A strategy for mitigating this is to follow up with exam-style questions which permeate across the practicals, with small groups continuing to support one another.
Do it yourself
Try any one of these mechanisms to make the most of your practical lessons and enhance students’ learning. It also means using a new strategy without the need to reinvent and rewrite old resources – so it’s efficient for teachers too!


No comments yet