








Explore what happens during precipitation reactions and when substances dissolve using this lesson plan with downloadable activities for 11–14 year olds
This simple practical activity challenges learners’ thinking about mass conservation when substances dissolve or when chemical reactions produce precipitates. Working in small groups they carry out a simple experiment and agree answers to questions.
-
Download this
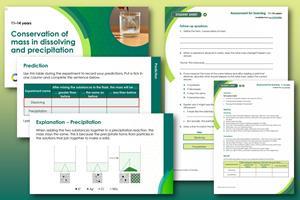
Everything you need to teach this lesson: slides, student worksheets at two levels (scaffolded and unscaffolded) and teacher guidance including answers.
View and download more Lesson plans
Learning objectives
- Recall the definition of conservation of mass.
- Predict the finding of an experiment using prior knowledge of particles and conservation of mass.
- Measure the mass of a solution accurately using a top pan balance accurate to ±0.01g.
- Analyse your results and link these to the principle of conservation of mass.
Introduction
In this lesson, learners will carry out a practical involving dissolving substances in water and mixing solutions to produce a precipitate. This provides an opportunity to challenge common misconceptions, particularly the idea that mass is ‘lost’ when a substance dissolves or is ‘gained’ when a solid appears during a reaction.
The lesson is framed around a key conceptual question: Where does a solid go when it dissolves, and where does a solid come from when it forms in a reaction?
Learners often rely on what they can see, leading to misunderstandings (e.g. dissolved substances no longer exist, or precipitates are ‘created’ from nothing). This practical is designed to make these observations explicit and create cognitive conflict.
The core scientific principle underpinning the lesson is the conservation of mass – that mass is neither created nor destroyed, even during chemical reactions. Learners should be guided to connect their observations and measurements of mass to particle-level explanations, recognising that substances are rearranged rather than lost or formed from nothing.
This simple practical activity challenges learners’ thinking about mass conservation when substances dissolve or when chemical reactions produce precipitates.
Scaffolding
There are two versions of the student worksheet: scaffolded (✪) and unscaffolded (✪✪). The scaffolded sheet offers more support to allow learners to access the questions. For example, learners may be asked to choose from a series of prepopulated answers or fill in gaps to answer longer questions. Some questions have more information to aid understanding.
Alternative strategy
If time and/or resources are short, you can demonstrate the chemical reactions. Groups can discuss the results and make their predictions as suggested.
Practical notes
Read our standard health and safety guidance and carry out a risk assessment before running any live practical.
Equipment
Apparatus
- A top pan balance accurate to ±0.01 g
- Prepared flask labelled ‘Dissolving’
- Prepared flask labelled ’Precipitation’
For the prepared flasks labelled ‘Dissolving’
- Conical flask, 500 cm3
- A small tube to fit comfortably inside the flask
- Stoppers to fit the flask tightly
- Water, about 150 cm3 in the flask
- About 5–10 g of one of these solids in the small tubes:
- sodium chloride,
- sugar,
- copper(ii) sulfate (HARMFUL)
For the prepared flasks labelled ‘Precipitation’
- Conical flask, 500 cm3
- A small tube to fit comfortably inside the flask
- Stoppers to fit the flask tightly
- Pairs of solutions at 1 mol dm−3 that form a precipitate on mixing. For example:
- sodium sulfate
barium nitrate (HARMFUL and OXIDISING) - potassium iodide
lead(ii) nitrate (TOXIC) - ammonium phosphate
calcium chloride (IRRITANT)
- sodium sulfate
Safety and hazards
- Learners should wear safety glasses throughout the practical activity.
- For all substances please refer to CLEAPPS, SSERC or your local safety advisory body for more information and advice regarding safe handling and disposal.
- The hazards will depend on the solute and the pair of solutions you have chosen. The information for the examples given are provided in the teacher notes.
Preparation
- To prepare the flasks, tie a piece of thread around the neck of each small tube. Ensure that the length of the thread supports the tube in an upright position in the flask but allows the contents to mix without being opened when the flask is tilted.
- Put the chosen solid into the tube. Put about 150 cm3 of water in the flask. Use the thread to arrange the prepared tube in the flask so that the contents mix when the flask is tilted. Label the flask ‘Dissolving’.
- Put the chosen solution (10–20 cm3) into the tube. Put the second solution in the flask. Use the thread to arrange the prepared tubes in the flask so that the contents mix when the flask is tilted. Label the flask ‘Precipitation’.
Method
Dissolving
-
Find the mass of the flask labelled ‘Dissolving’. Write this in the results table.
-
Tip the flask to one side so that the solid in the tube goes into the water in the flask.
-
Gently shake the flask.
-
Stop shaking when there is nothing changing in the flask.
-
Put a tick in the prediction table to show what you think the mass will be now.
-
Write down why you ticked that box.
-
Find the mass of the flask again. Write this in the results table.
-
Were you right? Write a conclusion explaining what you think happened.
Precipitation
-
Find the mass of the flask labelled ‘Precipitation’. Write this in the results table.
-
Tip the flask so that the liquid in the tube goes into the liquid in the flask.
-
Gently shake the flask to make sure the liquids mix well.
-
Put a tick in the prediction table to show what you think the mass will be now.
-
Write down why you ticked that box.
-
Find the mass of the flask again. Write this in the results table.
-
Were you right? Write a conclusion explaining what you think happened.
Teaching notes
Introduce the topic, and the learning objectives, by explaining to the learners that they are going to look at two events which:
- people often explain using different ideas
- they will come across a lot in chemistry, so they need to understand them correctly.
Pose the question to learners: Where does a solid go when it dissolves, and where does it come from when it appears?
Ask learners to work in groups to make predictions about what happens when they mix the two substances in the flask labelled Dissolving together, in terms of both physical observations and observations of mass, and to explain their predictions.
Learners then complete the practical, recording the mass before and after, discuss the results and agree on an explanation.
Learners repeat the above method, using the flask labelled Precipitation.
Learners work in groups to describe and explain their results. Each group should feed these back to the class. You can then clarify any misconceptions to ensure that learners understand that mass is conserved when substances dissolve and in precipitation reactions.
Allow learners time to complete the follow-up questions to consolidate their understanding.
Support and encourage learners to change their thinking to a scientifically correct viewpoint.
Answers
Answers to the follow-up questions can be found in the teacher notes and answers.
The mass values should remain unchanged during dissolving and precipitation. Responses should reflect this.
Primary teaching notes
If you teach primary science, see the guidance below to find out how to use this resource.
Skill development
Children will develop their working scientifically skills by:
- Asking their own questions about scientific phenomena.
- Using a range of scientific equipment to take accurate and precise measurements or readings.
- Using appropriate scientific language and ideas to explain, evaluate and communicate their findings.
Learning outcomes
Children will:
- Observe that some materials will dissolve in liquid to form a solution, and describe how to recover a substance from a solution.
- Demonstrate that dissolving, mixing and changes of state are reversible changes.
Concepts supported
Children will learn:
- That some materials dissolve to form a solution.
- That materials are still present when they have dissolved and that they haven’t disappeared.
- That mass is conserved when dissolving and precipitating.
Suggested activity use
This activity can be used as a whole class investigation into the dissolving and precipitation processes, with children working in small groups to observe and answer the questions given. Alternatively, the activities could be demonstrated by an adult to stimulate discussion and questioning.
Practical considerations
It is important that the key vocabulary ‘dissolve’ and ‘precipitate’ are understood correctly by children in the introduction of this activity.
The ‘Dissolve’ task is more relevant to the primary science curriculum and could be more heavily focused on.
Conical flasks, stoppers and tubes may not be required for this activity if alternatives can be sourced, such as mini pop bottles and clean fromage frais pots.
Downloads
Conservation of mass in dissolving and precipitation scaffolded student sheet
Handout | PDF, Size 0.19 mbConservation of mass in dissolving and precipitation unscaffolded student sheet
Handout | PDF, Size 0.16 mbConservation of mass in dissolving and precipitation teacher notes
Handout | PDF, Size 0.56 mbConservation of mass in dissolving and precipitation lesson slides
Presentation | PDF, Size 0.98 mbConservation of mass in dissolving and precipitation scaffolded student sheet
Editable handout | Word, Size 0.52 mbConservation of mass in dissolving and precipitation unscaffolded student sheet
Editable handout | Word, Size 0.52 mbConservation of mass in dissolving and precipitation teacher notes
Editable handout | Word, Size 0.59 mbConservation of mass in dissolving and precipitation lesson slides
Presentation | PowerPoint, Size 3.45 mb
Additional information
This lesson plan was originally part of the Assessment for Learning website, published in 2008. The resource was updated in 2026, with the addition of lesson slides and scaffolding by Emma Bickerstaffe.
Assessment for Learning is an effective way of actively involving students in their learning. Each session plan comes with suggestions about how to organise activities and worksheets that may be used with students.
Acknowledgements
V. Barker, Beyond Appearances: Student’s misconceptions about basic chemical ideas: A report prepared for The Royal Society of Chemistry, London. London: Royal Society of Chemistry, 2000.
- Prepare(3)
 Ideas
Ideas4 ways to teach the law of conservation of mass
Improve 11–14 year-old learners’ understanding of this fundamental chemistry topic
 CPD article
How to teach conservation of mass
Help students navigate the law of conservation of mass on dissolving and heating
 Course
Quantitative chemistry | Self-led course
Build confidence in your quantitative chemistry knowledge and discover effective topic-specific teaching strategies
- Deliver(4)
currently reading
 Lesson plan
Conservation of mass in dissolving and precipitation | 11–14 years
Explore what happens during precipitation reactions and when substances dissolve using this lesson plan
 Resource
Conservation of mass | Structure strip | 11–14 years
Use scaffolded prompts to support learners to write about conservation of mass
 Misconceptions
Mass and dissolving | Chemical misconceptions II | 11–14 years
Use these questions to explore dissolving solids in liquids and tackle common misconceptions
 Practical video
Conservation of mass | practical videos | 14–16 years
Video and supporting resources for two practical experiments exploring conservation of mass.
- Literacy(1)
 Resource
Introducing chemical change | Key terms support | 11–14
Language support pack for Introducing chemical change, with key terms list, accessible glossary, Frayer models and unscrambling definitions
- Enrich(1)
 Job profile
Cosmetics, technical services chemist
Sharlotte makes environmentally friendly, safe cosmetic products


No comments yet