


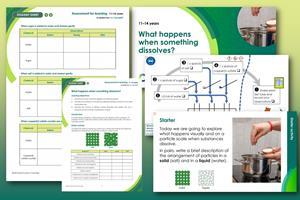
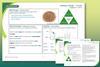
Explore dissolving and help your learners explain observations using the particle model with this lesson plan and activities
In this lesson, learners interpret information gained from practical work. They observe some simple practical demonstrations and use a question sheet to help them think about the process of dissolving.
-
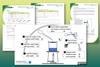
Download this
Get the lesson plan for this teacher demonstration and class practical, including presentation slides, two levels of student worksheet, teacher and technician notes.
View and download more Lesson plans
Learning objectives
- Recall the structure of particle diagrams for solids and liquids.
- Describe how particles of the solid are dispersed between particles of the liquid during dissolving.
- Describe the process of diffusion during dissolving and explain why this is evidence of the movement of particles in a liquid.
Learners should be able to link observations from a practical to the theory of dissolving using particle models to support them (student activity 1 and 2).
Introduction
In this lesson, learners will interpret the information they gain from practical work. They will observe some simple practical demonstrations and use a question sheet to help them think about the process of dissolving, dispersal and diffusion.
The lesson provides an opportunity for learners to:
- observe some physical changes and describe them fully
- think about the process of dissolving, dispersal and diffusion and use their knowledge of the particle model to explain their observations
Scaffolding
The scaffolded worksheet provides extra support for learners, giving them hints for the observations, opportunities to select answers from a range of given responses and completion of a gap fill task.
At the end of the unscaffolded sheet there is a challenge/extension task looking at the difference between soluble and insoluble substances to stretch learners’ understanding.
Integrated instructions are available in the PowerPoint presentation. Use these as an alternative to written instructions to reduce cognitive load.
If necessary, spend some time recapping the particle model for solids, liquids and gases, using resources from this Particle model topic package.
Depending on when you use this activity, learners may be familiar with the terms, solvent, solute and solution, in which case you could use them here. A list of some key terms is included in the PowerPoint presentation. You can find more support for literacy and vocabulary in our linked Key terms support bundle.
Sequence of activities
Introduction (slides 2–5)
- Introduce the idea of dissolving with the discussion question ‘If you drink a cup of tea with sugar in, do you have a mouthful of solid sugar as your drink it?’ (slide 2)
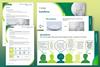
- In pairs, ask learners to write a brief description of the arrangement of particles in a solid (salt) and in a liquid (water) (slide 4). Learners can also answer this question on the student sheet using either the scaffolded (tick boxes) or unscaffolded version.
- Self-assess the answers to the starter question using the answers on slide 5.
Teacher demonstration (slides 7–10)
- Demonstrate what happens when crystals of potassium manganate(VII) are added to water using the teacher demonstration outlined on page 4 of this document.
- Tell learners that they should make notes about what the mixture looks like and how it changes before, during and after dissolving is complete.
- Allow learners to share their ideas in pairs. Person 1 presents their ideas. Person 2 actively listens and responds by agreeing, disagreeing or building on this point.
- Select a few groups to give feedback to the class. Write down any ideas and/or misconceptions learners have and save these for later reference.
Class practical (slides 11–17)
- Give each learner a copy of the student sheet which includes the method, tables for observations and follow-up questions.
- Supervise learners as they:
- work in pairs to follow the practical instructions
-record their results in the table on the worksheet - When the practical has finished, prior to starting the next task, make sure that all learners have the correct answers in their table. Take answers from learners to fill out the table on the PowerPoint. This will ensure that all learners are starting a written task with the same information.
Follow-up questions (slides 18–22)
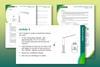
- Circulate and support learners as they work in pairs to draw particle diagrams to show what happens when a soluble solid (salt) dissolves in this liquid (water) and write an explanation of their observations from salt and water in terms of particles.
- Ask learners to work individually to explain their observations for copper sulfate and water.
- Circulate to support learners and check their answers before allowing them to self-assess or peer-assess using the answers from the PowerPoint slide. Remind learners to tick key points and note or highlight any missing ideas following your own marking policy.
-
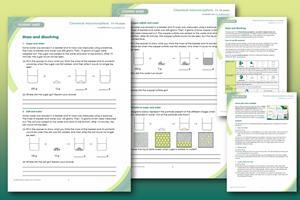
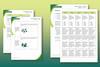
Worksheet: mass and dissolving
Give each learner a copy of the Chemical misconceptions worksheet ‘Mass and dissolving’. This can be completed in class or as a homework activity.
Technician notes
In this resource there is a teacher demonstration of potassium manganate(VII) dissolving in water and a whole class practical where learners dissolve small quantities of salt, sugar and copper sulfate in water and record their observations.
Read our standard health and safety guidance and carry out a risk assessment before running any live practical.
Teacher demonstration
Equipment
- A 1000 ml beaker
- Water
- Several crystals of potassium manganate(VII) (DANGER Irritant, oxidiser, harmful if swallowed, CLEAPPS Hazcard HC081)
- White card to provide a background
Safety and hazards
- Wear safety glasses even when dilute solutions are used
- Avoid raising dust when using the solid
- Take particular care to avoid skin contact. If spilt on skin/clothes, quickly brush off as much dry solid as possible. Irrigate with plenty of water
- Solid/solutions stain skin brown. Skin stains gradually fade over time
Procedure
- Fill the beaker two-thirds full of water.
- Carefully add the crystals of potassium manganate(VII).
- Leave and observe at regular intervals during the lesson.
Disposal
Dissolve no more than 5 g of the solid in 1 litre of water.
Then, add one of the following reducing agents, in portions while stirring, until the solution becomes colourless:
- sodium metabisulfite (approx 10 g), use a fume cupboard as sulfur dioxide gas may be produced
- iron(II) sulfate-7-water (approx 40 g)
Pour the resulting mixture down a foul-water drain with further dilution
Student practical
Equipment (per pair)
- 3 x test tubes
- Test tube rack
- Water
- Half a spatula of each of the following:
- Sugar
- Salt
- Copper(II) sulfate crystals (DANGER: irritant, corrosive, harmful if swallowed, CLEAPPS Hazcard HC027c)
- White card to provide a background
Safety and hazards
Wear safety glasses even when dilute solutions are used.
Procedure
- Fill the test tubes one-third full of water.
- Carefully add the sugar to one test tube.
- Carefully add the salt to the second test tube.
- Carefully add the copper(II) sulfate to the third test tube.
- Shake each test tube gently and observe any changes.
Answers
Answers to the follow-up questions are available in the teacher notes.
Downloads
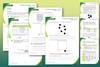
What happens when something dissolves slides
Presentation | PDF, Size 1.6 mbWhat happens when something dissolves student
Handout | PDF, Size 0.53 mbWhat happens when something dissolves scaffolded
Handout | PDF, Size 0.39 mbWhat happens when something dissolves teacher
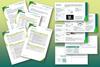
Handout | PDF, Size 0.7 mbWhat happens when something dissolves slides
Presentation | PowerPoint, Size 4.97 mbWhat happens when something dissolves student
Editable handout | Word, Size 0.97 mbWhat happens when something dissolves scaffolded
Editable handout | Word, Size 0.82 mbWhat happens when something dissolves teacher
Editable handout | Word, Size 0.72 mb
Additional information
This lesson plan was originally part of the Assessment for Learning website, published in 2008. Updated with new presentation slides added in 2025 by Emma Bickerstaffe.
Assessment for Learning is an effective way of actively involving students in their learning. Each session plan comes with suggestions about how to organise activities and worksheets that may be used with students.
Acknowledgement
K. Taber, Chemical misconceptions. London: Royal Society of Chemistry, 2002.
- Prepare(2)

 Course
Particle and atomic models | Self-led course
Strengthen your subject knowledge and discover teaching strategies to develop your learners’ understanding of the particle model and atomic structure
- Deliver(5)
currently reading
 Lesson plan
What happens when something dissolves? | Lesson plan | 11–14 years
Explore dissolving and help your learners explain observations using the particle model with this lesson plan and activities
 Misconceptions
Mass and dissolving | Chemical misconceptions II | 11–14 years
Use these questions to explore dissolving solids in liquids and tackle common misconceptions
 Resource
Dissolving salt | Johnstone’s triangle worksheets | 11–14 years
Use this worksheet to develop learners’ understanding of solutions as they observe how salt and sand behave in water
 Resource
Solutions | Developing understanding | 11–14 years
Encourage learners to deepen their understanding of solutions and how they are represented at different conceptual levels of thinking
 Resource
Solutions | Structure strip | 11–14 years
Support learners to retrieve information and write about solutions
- Literacy(3)
 Resource
Particle model | Key terms support | 11–14
Language support pack for particle model, with key terms list, accessible glossary, Frayer models and unscrambling definitions
 Resource
Particle model | Reading comprehension | 11–14 years
Use this reading comprehension based on a real science research news story to develop literacy skills and confidence
 Resource
Particle model | Structured talk | 11–14 years
In this speaking and listening task learners work together to build word bridges, building and sharing understanding by applying the particle model
- Enrich(3)
 Class experiment
Experiments with particles | Classic chemistry experiments | 11–14 years
Use common classroom items to explore physical states and how materials interact in these three practical investigations
 Resource
Solutions | Stretch and challenge | 11–14 years
Challenge learners to apply logical reasoning and their knowldge of particle model to explain experimental observations
 Class experiment
Dissolved substances in tap water and seawater
Compare the solids and gases dissolved in tap water and seawater in this class practical and demonstration
No comments yet