


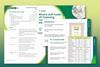
Entertaining and informative, these experiments use some household, and lab, items to bring chemistry into technicolour
Learners use colourful experiments to investigate the properties of colour and its use in chemistry.
Skill development
Learners will develop their working scientifically skills by:
- Drawing conclusions and raising further questions that could be investigated, based on their data and observations.
Learning objectives
- Use knowledge of solids, liquids and gases to decide how mixtures might be separated.
Concepts supported
Children will learn:
- The colour of inks and other coloured objects can be made up of a mixture of multiple colours and dyes.
Chromatography
Equipment
- Large circle of filter paper
- Plastic or paper bowl
- Selection of felt tip pens
- Selection of stencils
- Cup of cold tap water
Procedure
- Choose a stencil pattern and colour-in the dots using a selection of colours, or design your own using a series of dots.
- Rest the circle of filter paper on the paper bowl.
- Dip your finger in the cup of cold tap water to get a drop on the end and let it fall onto one of the coloured dots.
- Repeat this for all the dots.
- Watch what happens to the colours and ask the students to describe what they see.
- Explain how colours that we see can be made up from a series or other colours.
- Explain how this method can be used to identify inks in forensic science.
Bubbles
Equipment
- Garden wire, 20 cm
- Plastic or paper bowl
- Small amount of diluted washing up liquid
- Cup of cold tap water
Procedure
- Empty half a cup of cold tap water into a paper bowl and place it in the middle of the table.
- Add some washing up liquid.
- Take a length of garden wire and carefully twist it into a looped shape.
- Dip it into the bubble mixture to get a film and then hold it up to the light and observe.
- Discuss with the students what’s happening. Where else do they see similar effects?
Scatter tubes
Equipment
- Piece of card (dark coloured, 1/8 A4)
- Piece of silver prism paper (~3 cm square)
- Roll of tape
- Pair of scissors
- Small torch
Procedure
- Take the piece of card and bend it to make a short fat tube.
- Stick it in place using tape.
- Cut an opening in the tube at one end by making two slits, lifting the flap and cutting it off.
- Fix the piece of silver paper on the inside of the tube at the back opposite the opening.
- Stand the tube on a white surface and shine the torch through the opening and look down the top of the tube.
- Record your observations and discuss the results.
- How do these compare with those in the bubble experiment?
Multicoloured milk
Equipment
- Shallow tray – eg a foil flan dish with no holes in the bottom
- Enough milk to cover the base of the tray
- Four different food colours
- Four droppers or pipettes
- Small amount of diluted washing up liquid
Procedure
- Pour the milk into a clean shallow tray so that it covers the bottom.
- Make sure there are no traces of washing up liquid in the tray.
- Add five drops of one food colouring on top of each other in one quarter of the tray.
- Repeat with the other colours so you have four separate puddles of colour in the milk.
- Add one drop of diluted washing up liquid to the centre of the tray and watch what happens.
- Can the students suggest why this happens?
- Add a further drop of washing up liquid onto each colour and observe.
Traffic light demonstration
Equipment
- Beaker, 1 dm3 x 2
- Beaker, 250 cm3
- Stirring rod
- Warm water, 750 cm3 (~ 60°C from kettle)
- Glucose, 12 g
- Sodium hydroxide pellets, 6 g
- Indigo carmine indicator, 0.04 g
- Kettle
Procedure
This experiment should be done as a demonstration at primary level.
- Dissolve the sodium hydroxide pellets in 250 cm3 of cold tap water with stirring.
- Dissolve the glucose in 750 cm3 of warm water (~ 60°C).
- Add the indicator to the glucose solution and mix together until all the solution is dark blue.
- When the class is watching, pour in the sodium hydroxide solution and watch what happens.
- Pour the whole solution slowly from a height into the other large beaker.
Suggested activity use
This activity can form the basis for a group discussion where children look at how dyes and colours in pens and sweets are made. Alternatively, the resource can be used to generate questions and discussions around the topics of light, or dissolving and reversible changes.
The activity shows children how chromatography can be used as a separation technique – in this case as a way of separating mixtures of dyes and colours.
Practical considerations
It may be best to test different pens ahead of the lesson(s) in order to determine which ones give the best results.
Also, it may be difficult for primary schools to source the necessary equipment for the traffic light activity, in particular the sodium hydroxide pellets.
Downloads
Colour chemistry resource
Experiment | PDF, Size 2.51 mb


No comments yet