Mould learners’ understanding of monomers, polymers and more
The activity should take approximately one hour to complete in full. It was initially created for 11–14 year-old learners but can be adapted when teaching polymers to other age groups.
Use in a sequence of timetabled lessons, science clubs or as part of an activity day.
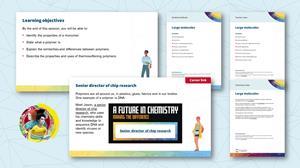
Learning objectives
- Identify the properties of a monomer.
- State what a polymer is.
- Explain the similarities and differences between polymers.
- Describe the properties and uses of thermosoftening polymers.

This resource was developed as part of the Chemistry for All project. The project was set up to explore and address barriers to participation in UK chemistry undergraduate study through a longitudinal project. Read the findings relevant to teachers, outreach providers, education policymakers and parents in the summary report, or download the full research report.
Careers
As learners enter the room, ask them to look at slide 3 of the PowerPoint and to discuss the question, ‘Why is chemistry important in each of these jobs?’ in groups.
The Chemistry for All project found that recognising the value and importance of chemistry, and appreciating how chemistry can lead to interesting and well-paid jobs strongly related to learners’ future aspirations. Discover how chemistry can prepare learners to pursue apprenticeships, university courses and vocational routes, or browse job profiles and try our career options game from A Future in Chemistry.
Guidance notes
Use the PowerPoint to introduce:
- the idea of polymers being the basis of most manufactured materials
- monomers and polymers
- the mechanism of how monomers bond to become polymers.
Point out to learners that polymers are all around them. Tell them that their school blazers (or other clothing), most plastic items in the room and even their DNA contain polymers.
Activity 1 requires learners to work in pairs to model monomers. Each ‘monomer pair’ will demonstrate how the double bond breaks and ‘opens up’ to allow them to bond with two other monomer pairs to form a polymer chain.
Activity 2 provides questions to check for understanding. Learners could answer the questions in their workbooks or on mini whiteboards.
Introduce the idea of cross-linking by discussing why some plastics are rigid and why some are flexible. Activity 3 allows learners to investigate thermosoftening polymers by heating and moulding a sample of polymorph.
More resources
- Show the effects of cross-links in polymers using the PVA polymer slime investigation.
- Watch patent attorney Charley’s video job profile to show learners there are lots of jobs they may not have considered requiring chemistry knowledge.
- Use the Recycling plastics evaluation with your 14–16 year-old learners to provide context when teaching life cycle assessments and the disposal of plastics.
Use the quick quiz at the end of the session to review the learners’ knowledge. Find all the answers in the teacher notes and on the slides.
Health and safety
Read our health and safety guidance and carry out a risk assessment before running any live practical.
The safety equipment suggested is in line with CLEAPSS requirements. For non-hazardous substances, wearing lab coats can help to protect clothes. The safety rules might be different where you live so it is worth checking local and school guidance.
Find more activities like this, plus longer projects suitable for off-timetable days, science lessons or clubs on our Outreach resources hub.
Downloads
Large molecules student workbook
Editable handout | Word, Size 0.55 mbLarge molecules student workbook
Handout | PDF, Size 0.49 mbLarge molecules teacher notes
Editable handout | Word, Size 0.57 mbLarge molecules teacher notes
Handout | PDF, Size 0.52 mbLarge molecules technician notes
Editable handout | Word, Size 0.47 mbLarge molecules technician notes
Handout | PDF, Size 0.34 mbLarge molecules presentation slides
Presentation | PowerPoint, Size 3.4 mbLarge molecules presentation slides
Presentation | PDF, Size 2.13 mbLarge molecules polymer letters
Editable handout | PowerPoint, Size 37.71 kb
Additional information
This resource was originally developed by Liverpool John Moores University to support outreach work delivered as part of the Chemistry for All project.


No comments yet