


Use these ideas and tips to help your students master titration
Titration is a form of volumetric analysis that we use to work out the concentration of a solution by reacting it with another solution of known concentration. We determine the end point of the reaction by observing a change, for example a pH change, by adding an indicator and observing a colour change.

Scientists use titration to test for purity in the pharmaceutical industry (e.g. to determine the amount of acetylsalicylic acid in aspirin tablets), to measure the amounts of certain compounds in food products – for example, vitamin C in orange juice – and to test water and waste products to ensure they meet environmental limits.
Many industrial titrations are automated but scientists still use manual titrations, for example to test the pH of rain samples. It is important that students know how to carry out a titration as this demonstrates they understand the underpinning knowledge.
What students need to know
Titration is a technique for determining a concentration through reaction. For students to be able to do this accurately, you will need to teach them to use highly precise equipment, such as volumetric pipettes and burettes. Students must be able to accurately read the scales on this equipment, taking care to read the number at the bottom of the meniscus.
Download this
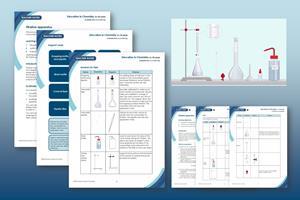
Titration apparatus, for age range 16–18
Use the resource with your post-16 learners to practise naming, describing the purpose and drawing simple diagrams of practical equipment.
Resource includes:
Download this
Titration apparatus, for age range 16–18
Use the resource with your post-16 learners to practise naming, describing the purpose and drawing simple diagrams of practical equipment.
Download the student worksheets and teacher notes, with answers, from the Education in Chemistry website: rsc.li/3VK0AoL
When students have found the average titre, they must work out a balanced equation. Students are unlikely to find these problematic for acid–base titrations but you may need to support them with writing redox equations.
Students must understand how to balance and combine half-equations. They also need to know how to use the reaction ratio and mole calculations together to work out:
- The number of moles of the known compound.
- The number of moles of the unknown compound.
- The unknown concentration.
Common misconceptions
Students should practise their practical skills and think about when to rinse equipment and which indicator to choose. Working through a virtual experiment allows students to consider these issues before putting them into practice.
Students do not often consider the range over which indicators work, meaning they can achieve different answers through incorrect indicator choice. These worksheets help students think about reagents and use this information to choose the correct indicator.
Once students have collected data, they can be confused about which of the volumes they should use in the final average titre. They need only use concordant results – generally those within 0.10 cm3 of each other. Students must consider the uncertainties this generates for the final average volume. You can review this with them using the article In uncertain terms.
Students should practise their practical skills and think about when to rinse equipment and which indicator to choose. Working through a virtual experiment (rsc.li/4eunGa2) allows students to consider these issues before putting them into practice.
Students do not often consider the range over which indicators work, meaning they can achieve different answers through incorrect indicator choice. Use the worksheets on acid–base indicators to help students think about reagents and use this information to choose the correct indicator (rsc.li/3RykQXM).
There are many everyday examples of redox reactions that you could use to provide context
Once students have collected data, they can be confused about which of the volumes they should use in the final average titre. They need only use concordant results – generally those within 0.10 cm3 of each other. Students must consider the uncertainties this generates for the final average volume. You can review this with them using the article ’In uncertain terms’ (rsc.li/4epLhJ7).
Ideas for your classroom
Start teaching post-16 titration by revisiting the acid–base titrations covered previously, at 14–16. Get students to sketch titration curves for strong and weak acid–base combinations on mini whiteboards to see if they remember how the pH will vary. Discuss what is happening at different points on these graphs, e.g. the buffer region, the equivalence point, the starting and final pHs. This will allow you to explore students’ prior conceptions. Carry out an acid–base titration, (e.g. this microscale practical) so students can practise their calculation skills. If students are not sure about mole calculations, including limiting reagents, you can revisit quantitative chemistry.
More resources
- Display the titration equipment and method infographic posters in your classroom for reference and revision.
- Use our practical skills tracking tool to help you give meaningful feedback and encourage learners to take ownership of developing their practical skills.
- Give learners a chance to see inside a pharmaceutical lab and introduce Claire, a bioanalytical scientist, with this careers video.
Once students are happy with a simple acid–base titration, move onto investigative work or a more complex reaction to maintain students’ engagement and enhance their skills.
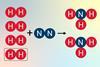
Introduce students to redox titration, where a redox reaction, rather than a neutralisation reaction, is used to show the end point. There are many everyday examples of redox reactions that you could use to provide context, including wine, vitamin C or iron. These titrations are often more complicated, requiring multiple equations, so have the answers to each step available for students to self-check.
It is important for students to be clear on the purpose of each step. For example, accounting for other oxidants in the blank or reference titration in this tannin investigation or firstly adding an excess of iodine in the vitamin C reaction and then titrating this excess to facilitate observation of the end point. Ask students to consider the ‘why?’ for each step. Pictorial diagrams help students understand what is happening at each stage of the reaction.
Start teaching post-16 titration by revisiting the acid–base titrations covered previously, at 14–16. Get students to sketch titration curves for strong and weak acid–base combinations on mini whiteboards to see if they remember how the pH will vary. Discuss what is happening at different points on these graphs, e.g. the buffer region, the equivalence point, the starting and final pHs. This will allow you to explore students’ prior conceptions. Carry out an acid–base titration, such as this microscale practical (rsc.li/3xjjWHZ), so students can practise their calculation skills. If students are not sure about mole calculations, including limiting reagents, you can revisit quantitative chemistry.
Once students are happy with a simple acid–base titration, move onto investigative work or a more complex reaction to maintain students’ engagement and enhance their skills.
Introduce students to redox titration, where a redox reaction, rather than a neutralisation reaction, is used to show the end point. There are many everyday examples of redox reactions that you could use to provide context, including wine, vitamin C or iron. These titrations are often more complicated, requiring multiple equations, so have the answers to each step available for students to self-check.
It is important for students to be clear on the purpose of each step. For example, accounting for other oxidants in the blank or reference titration in this tannin investigation (rsc.li/3zf6OE8) or firstly adding an excess of iodine in the vitamin C reaction and then titrating this excess to facilitate observation of the end point. Ask students to consider the why for each step. Pictorial diagrams help students understand what is happening at each stage of the reaction.
More resources
- Display the titration equipment infographic poster in your classroom for reference and revision: rsc.li/3Vyf61x
- Use our practical skills tracking tool to help you give meaningful feedback and encourage learners to take ownership of developing their practical skills: rsc.li/3KSaWwn
- Give learners a chance to see inside a pharmaceutical lab and introduce Claire, a bioanalytical scientist, with this careers video: rsc.li/45yehui
Checking for understanding
Introduce your students to a practical, either as a demo, simulation or hypothetical experiment and ask them to answer accompanying questions. Use a series of questions as you work through these titrations. This will allow you to check their understanding of both procedural techniques and the underlying theory and address any concerns as they arise. For example, ask:
- Why is rinsing the flask important?
- Which species is oxidised and which is reduced?
- What change do you expect to observe?
- What are the half-equations for the reagents?
- How do you combine and balance equations?
- What shows the end point of the reaction?
- What’s the ratio between the moles of known and unknown reagents?
- For redox examples, what is happening to each species?
To facilitate discussion and peer learning, get students to work in pairs to answer the questions. You can ask them to write their answers on mini whiteboards.
Take-home points
Building on their pre-16 learning, students need to develop a more precise experimental technique for titration and broaden their knowledge of its applications, making links with the work they have done on redox reactions.
Students must understand how to:
- Set up and accurately use equipment.
- Think about errors that arise from the equipment they use.
- Carry out an acid–base titration, choose an indicator and make links to titration curves.
- Link ideas from the redox topic to titrations, identify molar ratios from balanced equations and use them to calculate concentrations.
Article written by Jo Haywood. Resource written by Kristy Turner


1 Reader's comment