Everything you need to familiarise learners with the steps in this analytical technique
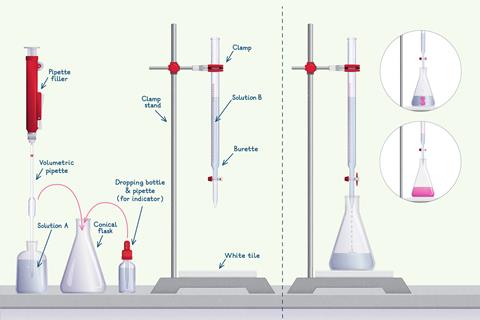
In a titration you follow a sequence of steps to get a valid and accurate result. Over time, scientists have refined the steps and developed a standard procedure. Every time we do a titration, we follow that standard procedure.
-
-
Titration investigation
Discover which indigestion tablet represents the best value by comparing the amount of active ingredient across different brands with this experiment from our Nuffield practical collection.
Fill the apparatus
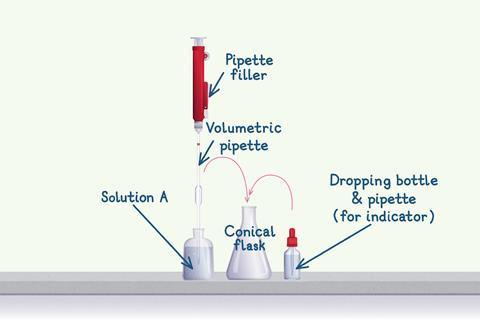
First, fill the volumetric pipette.
- Use a pipette filler to fill the pipette with solution A beyond the fill line.
- Break the seal with the filler and put your thumb over the end of the pipette.
- Let the solution out of the end of the pipette using small thumb movements until the meniscus rests on the fill line.
- When the meniscus rests on the fill line, let out the 25 cm3 portion of solution into the conical flask you will do the titration in. Never force the solution out of the end of the pipette, there should always be a drop of solution left.
Did you know …?
Until the 1970s, scientists didn’t use pipette fillers. They used to suck up the solution into the pipette with their mouths! They did this in chemical laboratories and in biological sciences with blood and other fluids. Scientists eventually stopped this practice because it was incredibly dangerous.
Next, fill the burette.
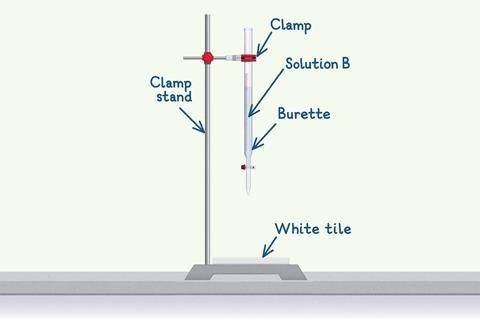
- Carefully clamp the burette to a clamp stand and make sure you close the burette tap.
- Then fill the burette with solution B using a funnel.
- Fill to above the 0.00 cm3 line then open the tap and let some solution through into an empty conical flask. This is to fill the air gap between the tap and the tip of the burette.
- Remove the funnel and the conical flask before you start the titration.
Determine an end point
When you have filled the burette and pipette, carry out the titration.
- Place the conical flask with solution A below the burette, on top of a white tile which will help you visualise the end point.
- Before you do any titration, make sure you add an indicator to the solution in the conical flask if you haven’t already done so.
- First, do a rough titration, followed by as many accurate titrations as you need to get concordant results (results within 0.10 cm3 of each other).
For a rough titration:
- Note the start point on the burette (it might not be 0.00 cm3) in a results table.
- Open the burette tap and let down solution B into the conical flask while you swirl the flask.
- Close the tap when you see a colour change.
- Record the volume on the burette in a table.


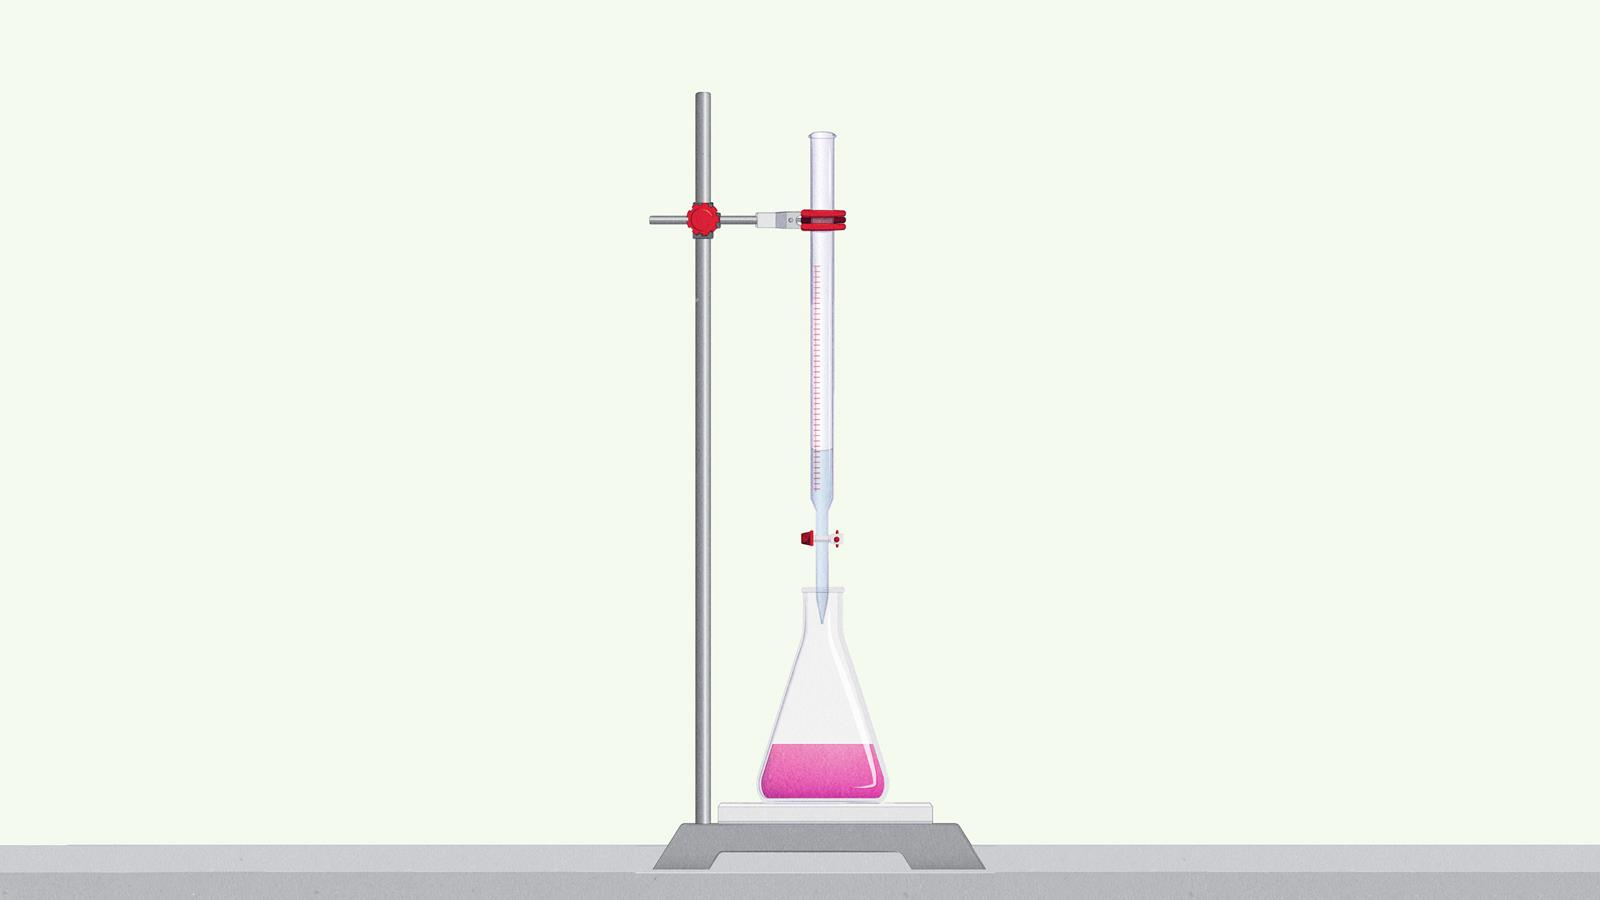
Add drops of solution from the burette to the conical flask while you swirl the flask
When the burette reading is within 5 cm3 of the end point from the rough titration, add the drops more slowly. Watch for the colour change to start
Record the reading on the burette when the colour change is complete
For an accurate titration,
- Note the start point on the burette in a table.
- Add solution B from the burette in small portions (around 1 cm3) by opening and closing the tap while you swirl the conical flask with your other hand.
- When the reading on the burette gets within 5 cm3 of the end point from the rough titration, add smaller portions of solution until eventually you are adding the solution in the burette dropwise.
- Squirt distilled water down the sides of the conical flask to make sure that any splashes of solution on the sides react.
- You will see the colour change occur over the addition of a single drop of solution B.
- Record the reading on the burette in a table.
| Volume | Rough | Run 1 | Run 2 |
|---|---|---|---|
| Start (cm3) | |||
| End (cm3) | |||
| Titre (cm3) |
More resources
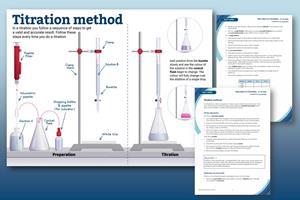
- Use the Mastering titration apparatus poster, fact sheet and resource to get your learners familiar with the equipment before they do a titration.
- Find ideas for successfully teaching titration, how to connect to theory and common misconceptions.
- From modelling to scaffolding, try these five approaches to help students master titration.
- Write balanced equations and calculate reacting masses and moles to find the limiting reagent with this acid-base back titration for learners aged 16–18 years.
- Learn how to prepare a standard solution, calculate the concentration of an unknown acid or moles of a known solid, and understand the different types of titration with these practical videos for 16–18 year-old learners.
Downloads
Titration poster
PDF, Size 0.99 mbTitration fact sheet
Handout | PDF, Size 0.12 mbIndigestion tablet titration student method and questions
Handout | PDF, Size 0.14 mbIndigestion tablet titration teacher notes and answers
Handout | PDF, Size 0.22 mbIndigestion tablet titration technician notes
Handout | PDF, Size 0.14 mbTitration fact sheet
Editable handout | Word, Size 0.46 mbIndigestion tablet titration student method and questions
Editable handout | Word, Size 0.45 mbIndigestion tablet titration teacher notes and answers
Editable handout | Word, Size 0.44 mbIndigestion tablet titration technician notes
Editable handout | Word, Size 0.46 mb






1 Reader's comment