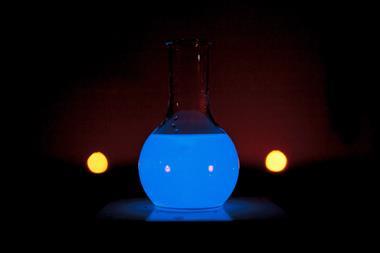
Delve into the treasure trove that is Microscale Gas Chemistry by Bruce Mattson (freely available online) and you’ll find solutions to problems you never even knew you had – including preparing chlorine. As well as highlighting great ideas for the production and uses of gases in the classroom, this demonstration also explores a fascinating property of oxygen: chemiluminescence. The beauty of the red glow created is made all the more alluring, as most illicit things are, by the knowledge that the electronic transition we’re witnessing is ‘forbidden’ by the quantum mechanical models.
Kit
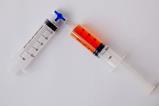
- 60 cm3 plastic syringe
- Syringe cap (ideally a LuerLOK system)
- 15 cm latex or silicone tubing to fit syringe nozzle
- Spotting tile
- Screw-top cap for a glass sample vial, with diameter less than the internal diameter of the syringe.
- 2x 250 cm3 beakers
- 100 cm3 of 1 M NaOH (corrosive)
- 3 cm3 Fresh household bleach, NaOCl (corrosive)
- 1 ml 6 M HCl (irritant)
- Glass Pasteur pipette
- Medium test tube (15 mm x 180 mm)
- 5 cm3 100 vol hydrogen peroxide, H2O2, (corrosive, causes serious eye damage)
- Approx. 1.2 g sodium hydroxide, NaOH (corrosive)
Preparation
Preparing chlorine
Read the following alongside the more detailed guidance provided in Microscale Gas Chemistry chapter 16, pages 233-235 and 247-248. You can also watch supporting video guides for further clarification of the exact technique (as well as the usual Exhibition Chemistry YouTube video).
Read the following alongside the more detailed guidance provided in Microscale Gas Chemistry (bit.ly/2UBzw9s) chapter 16, pages 233-235 and 247-248. You can also watch supporting video guides Mattson, 2010 (bit.ly/2QLK1If) for further clarification of the exact technique (as well as the usual Exhibition Chemistry YouTube video).
This is a method of making about 60 ml of chlorine in a syringe. It demonstrates a useful technique which can be used for many other gases. Wear splash-proof goggles and work in a fume cupboard near a large waste beaker or sink. Measure out 3 cm3 of the bleach into the dips in a spotting tile, approx. 100 cm3 1 M NaOH into a 250 cm3 beaker for neutralising the reactants following the preparation of the gas, and approx. 100 cm3 of water into another beaker for washing. Ensure the plunger moves smoothly within the syringe.
Remove the plunger from the syringe, and drop the vial cap in, open end up. Load 1 cm3 of 6 M HCl into the vial cap and float it in the water. Keeping the syringe upright with the nozzle held over the sink, lower the vial cap to the base of the syringe, without spilling its contents, by the evacuating water.
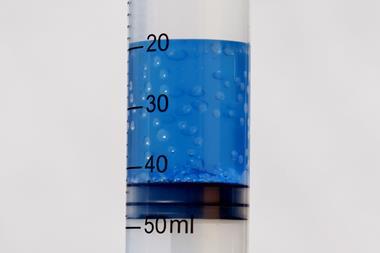
Keeping the syringe upright, replace the plunger for the syringe, and depress it until stopped by the vial cap. Draw up the bleach carefully to avoid sucking in air as well, and close the nozzle of the syringe with the syringe cap. Inverting and gently shaking the syringe will cause the liquids to mix; approx. 55 cm3 of chlorine gas will be produced within 30 seconds. Keep the nozzle facing up. You may need to assist the plunger in slowly moving back if the pressure of the gas is too low.
Once the syringe has reached the desired 60 cm3 mark, with the nozzle still held upwards, apply a small backwards pressure on the plunger to avoid spitting, and remove the syringe cap. Rotate the syringe 180° over the beaker of sodium hydroxide and discharge the liquid. Immediately draw up approx. 5 cm3 of water from the washing beaker. Cap and invert the syringe (nozzle up) and shake to wash any remaining reactants from the walls. Remove the cap, and invert once again (nozzle down) to flush out the liquid only before capping to complete the procedure.
Assembling the apparatus
Dissolve approx. 1.2 g of sodium hydroxide in 5 cm3 water. Add this to a medium-sized test tube held in a clamp stand. Insert a 15 cm-length piece of tubing into the wide end of a Pasteur pipette and place by the gas syringe. Have the 5 cm3 of hydrogen peroxide and a wash bottle of water standing by.
In front of the class
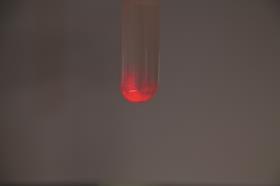
Add the hydrogen peroxide to the test tube. Sometimes it can begin to decompose before the chlorine is added – this reaction can be quenched with a little water from a wash bottle. Remove the cap from the syringe and fit the tubing/pipette to the nozzle. Turn off the lights in the room – a student by the switch can assist with this. Lower the nozzle of the pipette into the alkaline hydrogen peroxide and slowly bubble the chlorine gas through the solution. The stunning, vibrant red chemiluminescence of singlet oxygen is observed.
Tips
The bleach should be fresh and must be a ‘5% available chlorine’ bleach labelled as sodium chlorate(I)/sodium hypochlorite, and not a hydrogen peroxide-based bleach. Use budget bleach without additional thickeners or detergents.
I refer to Mattson’s bleach method (Method B) for the production of chlorine, although he suggests a better technique in the book (page 233) involving solid calcium hypochlorite (Method A), which may not be readily available in a typical school store cupboard.
Teaching goal
Apart from the fantastic red colour produced, there are a number of interesting aspects of collision theory, redox and spectroscopy that can be illustrated to students with this demonstration.
Hydrogen peroxide is able to reduce chlorine and is in turn oxidised to oxygen:
H2O2 (aq) + Cl2 (aq) → O2 (g) + 2HCl (aq)
In the ground state there would be two, spin-aligned, unpaired electrons in degenerate anti-bonding orbitals in the oxygen molecule. However, in the ‘singlet’ state formed in this reaction, two electrons pair up in the same orbital, which students will appreciate is a higher-energy configuration. The relaxation back to the ground state results in emission of a photon at 630 nm (Shakhashiri & Williams, 1976)[1] and students with an appreciation of the Planck equation and Avogadro’s number will be able to show this corresponds to approximately 190 kJ mol-1. This might put us firmly into the territory of covalent bond strengths were it not for an additional trick up oxygen’s sleeve: this relaxation is spin-forbidden. The only way the molecule can relax in this exact way, whilst conserving angular momentum in the products, is when two excited oxygen molecules come into contact, releasing one photon together – the actual energy difference between the excited and ground states for a single molecule is actually closer to 95 kJ mol-1. This explains the high concentrations of reactants required in the reaction: as the red glow depends on the production and collision of two excited molecules of oxygen, the intensity of the glow varies with the square of the singlet oxygen concentration.
Disposal
Pour the contents of the test tube into the beaker of water to dilute before washing down the sink with plenty of water.
Safety
Wear splash-proof goggles, avoid skin contact with the reagents, and work in a fume cupboard.
Downloads
Lighting up oxygen: Technician notes
PDF, Size 47.81 kbLighting up oxygen: Technician notes
Word, Size 53.97 kb
References
[1]Shakhashiri, B Z & Williams, L G, J. Chem. Educ., 1976, 53, 6, p358 DOI: 10.1021/ed053p358










2 readers' comments