


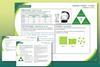
Compare the viscosity of different liquids, from cooking oil to water, with this simple practical
Provide learners with a set of identical tubes each containing a different liquid and instruct them to measure the time taken for a bubble to rise through the liquid. This is used to compare the viscosity of the liquids.
-
Download this
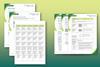
Everything you need to run this practical lesson with classroom slides, scaffolded and unscaffolded student worksheets and teacher guidance, including full technical notes and answers to all questions.
View and download more Classic chemistry experiments
Learning objectives
- Compare the viscosity of different liquids by making careful observations.
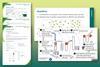
- Apply your understanding of particles to explain your observations.
- Design an experiment.
Learners will meet objective 1 as they carry out the experiment, complete a results table and answer questions 1−3 on the student worksheet. They will meet objective 2 by correctly answering questions 4−6 on the student worksheet and objective 3 by answering questions 7 and 8 on the student worksheet.
Scaffolding
There are two versions of the student worksheet:
- The scaffolded student sheet (✪) offers additional scaffolding and support, such as fill-in-the gap style questions and a structure strip to help design an experiment;
- The unscaffolded student sheet (✪✪) has similar questions but with free text answers.
Integrated instructions are included in the presentation.
Technician notes
Read our standard health and safety guidance and carry out a risk assessment before running any live practical.
Equipment (per group)
Apparatus
- Stopwatch
- Sealed tubes of different liquids
Chemicals
Choose from:
- Water
- Cooking oil
- Washing up liquid
- Ethanol (DANGER: highly flammable liquid and vapour)
- Shampoo or bubble bath
- Honey
Safety equipment
- Eye protection: safety glasses to EN1 66F
Safety and hazards
- Ethanol is flammable, ensure no naked flames or other sources of ignition (see CLEAPSS Hazcard HC040a/SSERC).
Procedure

Take one of the tubes provided.
- Ensure the bubble is at the top and the tube is held vertical.
- Quickly invert the tube and measure the time it takes for the bubble to each the top.
- Repeat this measurement for all the samples.
- Complete the table provided.
Teaching notes
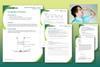
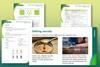
Start this lesson by finding out what learners already know about viscosity. Use the images provided on slide 3 of the presentation or pour a couple of different liquids into a beaker to promote discussion and make sure learners understand the term.
Ask learners to carry out the practical in small groups of two or three. Encourage learners to carry out repeat experiments and calculate the mean time for each liquid. For results to be repeatable, remind learners to time each liquid using a consistent method – e.g. measure the time from inversion until the ‘bubble first hits the top’. Remind learners how to work out the average time, if necessary.
Answers
- Level 1 and level 2 sheets
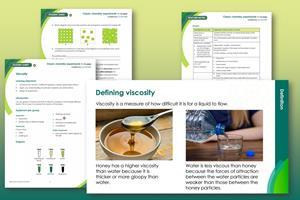
Viscosity is a measure of how difficult it is for a liquid to flow. Liquids with a higher viscosity appear to be ‘thicker’ or more ‘gloopy’ than those with a low viscosity.
- Level 1 and level 2 sheets
Liquid – it depends on the liquids used but is most likely to be the honey or shampoo.
Reason – the bubble took the longest time to rise through the liquid.
- Level 1 and level 2 sheets
Liquid − it depends on the liquids used but is most likely to be the ethanol.
Reason – the bubble took the shortest time to rise through the liquid.
- Level 2 sheet: see teacher notes
Level 1 sheet: C
- Level 1 and level 2 sheets
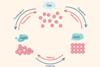
The particles slide over each other.
They flow from the bottle into the frying pan.
- Level 1 and level 2 sheets
Water is less viscous than bubble bath because there are less forces of attraction between the water molecules than those between the bubble bath particles. This makes it easier for the water molecules to flow than it is for the bubble bath particles.
- Level 1 and level 2 sheets
The viscosity will decrease. As the particles in the liquid gain more kinetic energy, it will be easier to overcome the forces of attraction between the particles.
- See structure strip.
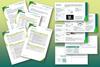
Downloads
Viscosity presentation
Presentation | PDF, Size 0.78 mbViscosity student scaffolded sheet
Handout | PDF, Size 0.22 mbViscosity student unscaffolded sheet
Handout | PDF, Size 0.16 mbViscosity teacher notes
Handout | PDF, Size 0.47 mbViscosity presentation
Presentation | PowerPoint, Size 2.01 mbViscosity student scaffolded sheet
Editable handout | Word, Size 0.67 mbViscosity student unscaffolded sheet
Editable handout | Word, Size 0.55 mbViscosity teacher notes
Editable handout | Word, Size 1.27 mb
Additional information
This practical is part of our Classic chemistry experiments collection. The supporting resources were updated in 2025 by Dorothy Warren.
- Prepare(2)
 Resource
States of matter | Beyond appearances
Deconstruct misconceptions learners may have around states of matter and understand what this means for your teaching
 Course
Particle and atomic models | Self-led course
Strengthen your subject knowledge and discover teaching strategies to develop your learners’ understanding of the particle model and atomic structure
- Deliver(6)
 Poster
Everything you need to teach states of matter
Particle diagrams, changes of state and their properties – perfect for your 11–14 year-old learners
 Resource
States of matter | Developing understanding | 11–14 years
Encourage learners to deepen their understanding of states of matter and how they are represented at different conceptual levels of thinking
 Resource
States of matter | Johnstone’s triangle worksheets | 11–14 years
Use this worksheet to develop learners’ understanding of states of matter, including a teacher demonstration
 Resource
States of matter | Structure strip | 11–14 years
Support learners to recall and write about the properties of solids, liquids and gases
 Exhibition chemistry
Demonstrate changes of state using volume differences
Use this demonstration to reinforce the differences between states of matter with your 11–14 learners
 Demonstration
The sublimation of air freshener | 11–14 years
Use this experiment to demonstrate sublimation, showing how solid air freshener changes directly from a solid to a gas. Includes kit list and safety instructions.
- Literacy(3)
 Resource
Particle model | Key terms support | 11–14
Language support pack for particle model, with key terms list, accessible glossary, Frayer models and unscrambling definitions
 Resource
Particle model | Reading comprehension | 11–14 years
Use this reading comprehension based on a real science research news story to develop literacy skills and confidence
 Resource
Particle model | Structured talk | 11–14 years
In this speaking and listening task learners work together to build word bridges, building and sharing understanding by applying the particle model
- Enrich(8)
currently reading
 Class experiment
Viscosity | Classic chemistry experiments | 11–14 years
Compare the viscosity of thick and thin liquids by measuring the time is takes for a bubble to move through them
 Games and puzzles
States of matter 1 | Gridlocks puzzle | 11–14 years
Reinforce your students’ understanding of states of matter using these sudoku-style puzzles, with printable worksheets and answers
 Games and puzzles
States of matter 2 | Gridlocks puzzle | 11–14 years
Reinforce your students’ understanding of states of matter using these sudoku-style puzzles, with printable worksheets and answers
 Class experiment
Particles in motion? | Classic chemistry experiments | 11–14 years
Explore the movement of gas particles by reacting calcium carbonate with hydrochloric acid and testing with limewater
 Job profile
Scientist, food and pharmaceuticals
Taryn uses scientific instruments to test our food and medicines and make sure they are safe

 Exhibition chemistry
Superheated steam
Ready to start a fire with water? Use this demo to teach students about enthalpy and properties of water
 Job profile
Laboratory analyst and higher degree apprentice, water
Joseph helps ensure there is clean, safe, water for 15 million people in the UK whilst studying towards his chemistry degree

No comments yet