


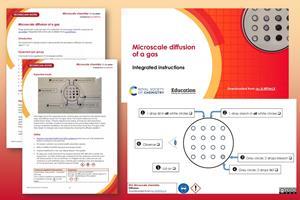
Small and microscale chemistry practicals provide plenty of variety and opportunity to refine observation skills
Following integrated instructions, learners will observe the diffusion of chlorine gas. Read our article How to teach states of matter and particle theory for more support and ideas for teaching this topic.
-
Download this
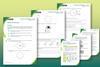
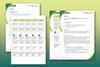
All the information you need to prepare, set up and run this experiment with your learners:
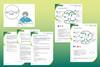
- Technician notes as pdf and MS Word
- Integrated instructions as pdf and MS PowerPoint
Learning objectives
- Make detailed and accurate observations of the colour changes associated with this reaction.
- Use your observations to infer what is happening during the process of diffusion.
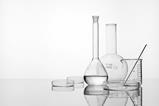
Equipment (per group)
Chemicals to be supplied in 10 ml dropper bottles:
- Chlorine-based bleach solution (50% solution or ~0.25 mol dm-3) or sodium hypochlorite (2.5% w/v), 2 drops
- Starch solution (1% solution), 15 drops
- Hydrochloric acid (1 mol dm-3), 15 drops
- Potassium iodide (0.2 mol dm-3), 15 drops
- A4 print out of integrated instructions (laminated or within a plastic wallet)
- Pasteur pipettes x 3
- Paper towels
- Petri dish and lid
Safety equipment
- Eye protection: safety glasses to EN166 F
Health, safety and technical notes
- Read our standard health and safety guidance and carry out a risk assessment before running any live practical. If in doubt, contact your school health and safety advisor.
- Refer to SSERC/CLEAPSS or another reputable source for full risk assessment guidance. Hazard classification may vary depending on the supplier.
- By using very small volumes of the solutions and the Petri dish lid to contain the experiment, very little chlorine gas is released into the classroom, however some will still be present in the environment. To mitigate this risk, make sure you are working in a well-ventilated area. Chlorine gas is oxidising, toxic and dangerous to the environment, see CLEAPSS HC022.
- Wear eye protection (safety glasses to EN166 F).
- Wash hands after completing the practical.
Read the technician notes for full safety information, preparation and disposal.
More resources
- Our microscale collection has more information and tips, plus lots more microscale experiments.
- Help learners connect observations to theory with useful activities and approaches to deepen understanding at macroscopic, sub-microscopic and symbolic levels.
- Read our CPD article to understand how to incorporate this practical when teaching states of matter.
- Find out how Giorgia applies her knowledge of chemistry to her role in developing smart food labels to reduce food waste.
Equipment set-up
Ensure the bleach is a chlorine-based preparation rather than an oxygen-based solution and that it does not contain hydroxides, which can reduce the chlorine production. Remember to check the hazard warning labels of the specific bleach solution you use and risk assess accordingly.
Note that sodium hypochlorite has a limited shelf-life and its concentration will decrease over time, especially if kept in a warm environment. Check the experiment generates enough chlorine gas to observe a colour change. If not, you can increase the number of drops of 2.5% (w/v) sodium hypochlorite as long as the solutions fit in the reaction vessel.
If insufficient chlorine is generated and the reaction vessel is full then use a 5% (w/v) solution of sodium hypochlorite for the teacher to dispense, as this is not suitable for learners under year 12. Conduct a revised risk assessment with adequate adjustments of the control measures, such as wearing safety goggles as eye protection or doing the experiment as a demonstration under a visualiser.
Learners can perform the experiment on a laminated copy of the integrated instructions, a copy placed inside a plastic wallet, or in a Petri dish placed over the sheet. An A4 printout inside a plastic wallet has better surface tension compared with a laminated template.
Method
- Add one drop of potassium iodide to every white circle.
- Then, add one drop of starch to every white circle. Starch is an indicator and will turn blue-black as it reacts with the iodine displaced by the chlorine gas.
- Add two drops of bleach solution to the grey circle.
- Add two drops of hydrochloric acid to the grey circle.
- Carefully place an upturned Petri dish (or lid if using a Petri dish over the integrated instructions) over the grid and observe.
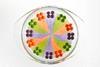
Expected results
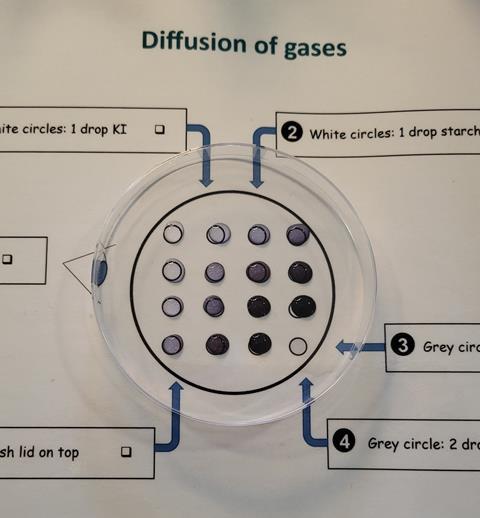
Chlorine gas is evolved from the bleach/acid drop, and diffuses away from the grey circle. The chlorine dissolves into the iodide/starch drops. Chlorine displaces the iodine, forming the dark blue/black iodine/starch complex. Learners should observe the surrounding iodide/starch drops turning completely blue/black. The drops that are further away from the grey circle take longer to change colour and change less, showing the diffusion gradient.
Disposal information
When the reaction is complete, wipe up the drops with a paper towel and dispose of the paper towel in laboratory waste.
Technician tip: put the paper towels/cloths into a bucket of water before disposal. This dilutes the chlorine and prevents students or teachers accidentally inhaling a small amount of chlorine when opening the bin lid.
Downloads
Microscale diffusion of a gas technician notes
Handout | PDF, Size 0.41 mbMicroscale diffusion of gas integrated instructions
Handout | PDF, Size 0.46 mbMicroscale diffusion of a gas technician notes
Editable handout | Word, Size 1.26 mbMicroscale diffusion of gas integrated instructions
Editable handout | PowerPoint, Size 0.4 mb
Additional information
This resource was originally published with the article How to teach states of matter and particle theory. It is based on a method published in Microscale chemistry: experiments in miniature practical number 32, A microscale study of gaseous diffusion.
- Prepare(2)
 Ideas
IdeasExplicitly teach learners how to make observations
How to give students the skills to describe and explain what they see scientifically
 Course
Particle and atomic models | Self-led course
Strengthen your subject knowledge and discover teaching strategies to develop your learners’ understanding of the particle model and atomic structure
- Deliver(7)
 Resource
Diffusion and chemical reactions | Developing understanding | 11–14 years
Use this worksheet to deepen understanding of diffusion and chemical reactions and how these processes are represented
 Resource
Diffusion and dissolving | Developing understanding | 11–14 years
Deepen learners’ understanding of diffusion and dissolving with this worksheet exploring different conceptual levels of thinking
 Resource
Diffusion | Structure strip | 11–14 years
Use scaffolded prompts to support learners to write about diffusion
currently reading
 Class experiment
Microscale diffusion of a gas | 11–16 years
Explore diffusion with this simple and effective microscale experiment
 Exhibition chemistry
Dissolve coloured sweets to create a rainbow
Demonstrate diffusion, density and the particle model to your 14–16 learners in this easy experiment
 Resource
Microscale neutralisation and precipitation reactions | 11–16 years
Hone your learners’ observation skills with two microscale reactions: neutralising citric acid and creating a lead iodide precipitate
 Class experiment
Diffusion of gases – a safer alternative to bromine
Diffusing gases can be a tricky thing to do, but by creating an alternative to bromine, you can make a safer classroom alternative for this process. Kit list and safety instructions included.
- Literacy(3)
 Resource
Particle model | Key terms support | 11–14
Language support pack for particle model, with key terms list, accessible glossary, Frayer models and unscrambling definitions
 Resource
Particle model | Reading comprehension | 11–14 years
Use this reading comprehension based on a real science research news story to develop literacy skills and confidence
 Resource
Particle model | Structured talk | 11–14 years
In this speaking and listening task learners work together to build word bridges, building and sharing understanding by applying the particle model
- Enrich(4)
 Feature
Sniffing out the science of smells
What makes a bad smell smell bad? Sniff out the chemical culprits behind obnoxious odours
 Job profile
Dermal toxicologist
Hazem explores how harmful substances can affect the skin and sometimes enter the body.
 Job profile
Principal air quality consultant
Saba’s air quality assessments help clients worldwide to minimise their air pollution
 Job profile
Senior principal scientist
Misbah uses computers to predict which catalysts will be best at removing harmful pollutants from road-using vehicles


No comments yet