


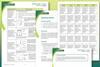
Analyse the salts that crystallise from evaporating seawater, illustrating cation and anion tests in this demonstration
In this experiment, students observe as seawater is gradually evaporated, leading to different salts crystallising out at different stages. These salts are then analysed by testing for cations and anions, using flame tests to identify the cations and other methods for identifying the anions.
This is best done as a class demonstration. The evaporation takes some time, so the theory of the cation and anion tests can be explained while it is taking place.
Students might have met flame tests and anion tests before, in which case this is good reinforcement in a familiar context. If this is a first experience of simple inorganic analysis, students might find it quite difficult unless it is carefully presented.
The students could either test the samples of solids formed, although not much is obtained in some cases. An alternative is to carry out the evaporation but provide samples of the expected salts for the students to analyse - see the results table in the teaching notes below.
It should be possible to complete the experiment in an hour and a half.
Try these related experiments
Explore this topic further by comparing the substances dissolved in tap water and seawater, or practise separating salts from seawater to introduce younger students to key ideas and important practical skills.
Equipment
Apparatus
- Eye protection (goggles)
- Beakers (say 2000 cm3, 400 cm3, 250 cm3, 100 cm3), 1 of each
- Bunsen burner
- Tripod and gauze
- Heat resistant mat
- Vacuum filtration apparatus (see note 10 below)
- Test tubes, x6
- Test tube rack
- Nichrome wire, short lengths for flame tests (see note 11)
- Watch-glass
Chemicals
- Seawater, about 1 dm3 (see note 12)
- Limewater (IRRITANT), 50 cm3
- Silver nitrate solution, 0.1 M, 10 cm3
- Barium chloride solution, 0.1 M (HARMFUL), 10 cm3
- Magneson reagent, 1 cm3 (see note 9)
- Concentrated hydrochloric acid, (CORROSIVE), 5 cm3
- Dilute hydrochloric acid, 2 M (IRRITANT), 10 cm3
- Dilute nitric acid, 2 M (CORROSIVE), 10 cm3
- Distilled or deionised water, 20 cm3
Health, safety and technical notes
- Read our standard health and safety guidance.
- Wear eye protection (goggles) throughout.
- Limewater (calcium hydroxide solution), Ca(OH)2(aq), (treat as IRRITANT) – see CLEAPSS Hazcard HC018 and CLEAPSS Recipe Book RB020.
- Silver nitrate solution, AgNO3(aq) – see CLEAPSS Hazcard HC087 and CLEAPSS Recipe Book RB077. At this concentration silver nitrate solution will stain skin and clothes.
- Barium chloride solution, BaCl2(aq) (HARMFUL) – see CLEAPSS Hazcard HC010A and CLEAPSS Recipe Book RB010.
- Concentrated hydrochloric acid, HCl(aq), (CORROSIVE) – see CLEAPSS Hazcard HC047a and CLEAPSS Recipe Book RB043.
- Dilute hydrochloric acid, 2 M (IRRITANT) – see CLEAPSS Hazcard HC047a.
- Nitric acid, HNO3(aq), (CORROSIVE) – see CLEAPSS Hazcard HC067 and CLEAPSS Recipe Book RB061.
- Magneson reagent (test for magnesium ions) can be made by dissolving 0.001g of magneson (HARMFUL) in 100 cm3 of distilled or deionised water.
- Vacuum filtration apparatus: Buchner funnel and flask, filter paper, access to a vacuum pump - see CLEAPSS Laboratory handbook.
- If students are doing the analysis, flame tests can be carried out by leaving a wooden splint to soak in a mixture of the solid and dilute hydrochloric acid for a few minutes and then placing the splint in a non-luminous Bunsen flame.
- If the real seawater is not available, it can be made up as described in the CLEAPSS Recipe Book.
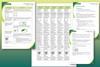
Procedure
- Set up a heat resistant mat, Bunsen burner, tripod and gauze.
- Place 1 dm3 of seawater in a 2 dm3 beaker and evaporate it to 250 cm3.
- Filter the solution through a vacuum filter. Keep the solid residue for testing.
- Place the filtrate in a 400 cm3 beaker and evaporate it to 125 cm3. Filter.
- Repeat (using suitable sized beakers), filtering at 25, 10 and 5 cm3. Evaporate the last two carefully as spitting might occur.
- Scrape some of the residue at 250 cm3 into a test tube and add a 1 cm depth of 2 M hydrochloric acid. The residue should fizz. Show the presence of a carbonate by bubbling some of the gas through limewater.
- Carry out a flame test on the solid from step 6. A ‘brick red’ flame should indicate the presence of calcium. (Flame test: Dip a piece of nichrome wire in a few drops of concentrated hydrochloric acid on a watch glass and then hold it in the side of a roaring Bunsen flame until no colour is seen. Dip in the acid again and then dip into the solid. Place the wire in the side of the flame again. If no colour is seen, dip into the acid again. Use a fresh wire and fresh sample of acid for each test.)
- Repeat tests from steps 6 and 7 on the residue at 125 cm3. The same results should be obtained.
- Also, add an equal volume of barium chloride solution, 0.1 M, to the tube from step 6. A white precipitate should form, indicating sulfate.
- Repeat tests from steps 8 and 9 on part of the residue at 25 cm3. A yellow sodium flame should result and a faint white precipitate, indicating a sulfate, should be seen.
- Dissolve some more of the residue at 25 cm3 in 1 cm depth of dilute nitric acid. Add an equal volume of silver nitrate solution. A white precipitate should indicate chloride.
- Repeat tests from steps 10 and 11 on some of the residue at 10 cm3. The presence of sulfate ions should be shown again.
- Shake some of the residue from 10 cm3 with distilled water and add five drops of magneson reagent. A blue precipitate indicates the presence of a magnesium salt.
- Repeat tests from steps 12 and 13 on the residue from 5 cm3. A lilac potassium flame should be seen, although this may be masked by the yellow flame of sodium which may still be present. If this occurs, try viewing the flame through blue glass. Indications of magnesium and chloride should also be found.
Teaching notes
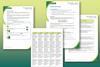
A summary of the expected results is shown below. Note that there may well be additional salts to those listed present.
| Volume / cm3 | Cations present | Anions present | Salt present |
|---|---|---|---|
| 250 | calcium | carbonate | calcium carbonate |
| 125 | calcium | sulfate | calcium sulfate |
| 25 | sodium | chloride | sodium chloride |
| 10 | magnesium | sulfate | magnesium sulfate |
| 5 | potassium and magnesium | chloride | Potassium chloride and magnesium chloride |
Flame colours are:
- Calcium – ‘brick red’
- Sodium – yellow-orange
- Potassium – lilac
- Magnesium – none
Small sodium impurities will show up in all flame tests. Only record sodium present for a bright yellow-orange flame.
The blue precipitate with magneson reagent is a magnesium complex ion.
The salts are deposited in order of their solubility, the least soluble first. (Students sometimes need help with this concept.)
Calcium carbonate comes from calcium hydrogencarbonate in solution:
Ca(HCO3)2(aq) → CaCO3(s) + H2O(l) + CO2(l)
The test for carbonate is the production of carbon dioxide with hydrochloric acid:
CaCO3(s) + 2HCl(aq) → CaCl2(aq) + CO2(g) + H2O(l)
The carbon dioxide reacts with limewater to form a white precipitate:
CO2(g) + Ca(OH)2(aq) → CaCO3(s) + H2O(l)
The test for sulfate is a white precipitate with barium chloride (that does not dissolve in dilute hydrochloric acid):
MgSO4(aq) + BaCl2(aq) → BaSO4(s) + MgCl2(aq)
The test for chloride is a white precipitate with silver nitrate (that does not dissolve in dilute nitric acid):
KCl(aq) + AgNO3(aq) → AgCl(s) + KNO3(aq)
Additional information
This is a resource from the Practical Chemistry project, developed by the Nuffield Foundation and the Royal Society of Chemistry.
Practical Chemistry activities accompany Practical Physics and Practical Biology.
© Nuffield Foundation and the Royal Society of Chemistry

No comments yet