


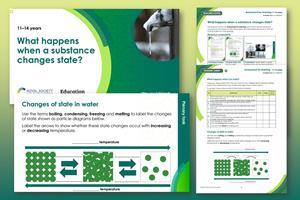
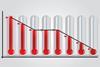
Explore what happens when substances warm, cool, boil or freeze and tackle misconceptions about changes of state
In this activity, learners watch a demonstration, then answer questions to probe their misconceptions and to develop scientific understanding about what happens when a substance changes state.
-
Download this
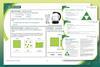
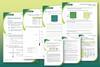
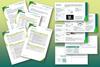
Everything you need to teach this lesson: slides, student worksheets at two levels (scaffolded and unscaffolded) and teacher guidance, including technician notes and answers.
View and download more Lesson plans
Students will be able to explain that:
- Molecules do not break up and reform when a substance boils and cools.
- Particles stay the same size and shape during state changes.
- Particles move around and are not static.
- Freezing means ‘liquid changing to solid’ and does not rely on cold temperatures.
Learning objectives
- Recall the definitions of freezing, boiling and melting as changes of state.
- Describe the difference between particle diagrams at different states.
- Explain that molecules do not break up and reform when a substance boils and cools.
Get learners to work together to determine whether a series of statements are true or false based on their understanding of melting and boiling.
Scaffolding
To support learners further, a scaffolded version of the student sheet is available, which gives learners hints in the table headings. These will support learners’ working memory as they will elicit prior knowledge discussed in this lesson and previous lessons.
At the end of the unscaffolded worksheet, there is a challenge task, which asks learners to also label freezing and condensing, and to label an arrow to show increasing and decreasing energy of the particles.
Sequence of activities
Eliciting ideas – oracy activity (slides 2–3)
Collect learners’ ideas about the meanings of freezing, melting, condensing and boiling.
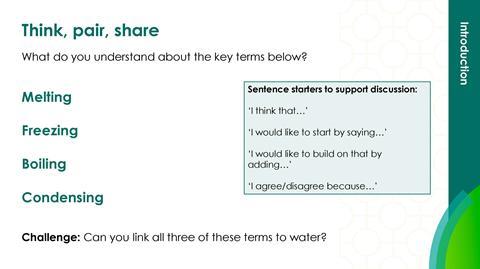
Show learners slide 3, then give them 30 seconds thinking time. Then allow learners to share their ideas in pairs:
- Person 1 presents their ideas on boiling. Person 2 actively listens and responds by agreeing, disagreeing or building on this point.
- Person 2 presents their ideas on freezing and the pair repeat the above cycle until they have discussed all four words.
Select a few groups to feed back to the class. Write down the ideas/misconceptions learners have and save these for later reference.
Demonstration and activity: stage 1 (slides 4–10)
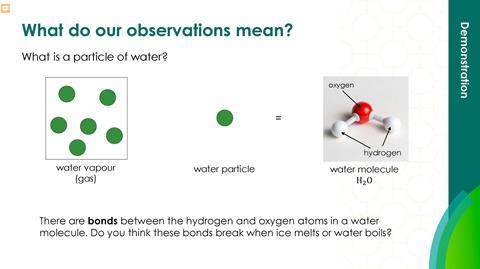
- Using a Bunsen burner, demonstrate what happens when water boils. Learners should make observations about bubbles and steam being produced as the temperature of the water increases.
- Explain the difference between observations and inferences and then show learners the particle diagrams of the change of state between a liquid and a gas. Then on whiteboards, ask learners to describe what has happened as the substance has changed state from a liquid to a gas.
- Invite learners to work individually on completing the first part of the worksheet.
Activity: stage 2 (slide 11)
Organise students into groups of four. Circulate and support as groups:
- Discuss their individual responses, working towards consensus.
- Prepare a response to feedback to the class.
- Elect a spokesperson.
Plenary 1 (slides 12–14)
In a plenary:
- Invite responses from each group.
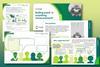
- Lead learners towards a scientifically correct viewpoint using the graphic on the PowerPoint.
- Encourage learners to try and visualise what is happening to the water at a molecular level. (Find out more about this ‘molecular spectacles’ technique.)
- Ask them to correct their worksheet, if they need to.
Demonstration and activity: stage 3 (slides 15–16)
- Introduce the next task, which is to look at the liquid–solid state change.
- Place a beaker of ice cubes in front of the class/on each table. This can be warmed gently but may also be left at room temperature.
- Invite students to work individually on completing the second page of the worksheet.
Activity: stage 4 (slide 17)
Reform the groups of four learners. Circulate and support as groups:
- Discuss their individual responses, working towards a consensus.
- Prepare a response to feed back to the class.
- Elect a spokesperson.
Plenary 2 (slides 18–23)
In a plenary:
- Invite reports from each group.
- Show learners slides 19 and 20 to support the development of the concept that intermolecular forces exist between the water molecules in ice.
- Label the changes of state on a particle diagram for water and add an arrow showing the direction in which the state change occurs when the substance is either being heated up or cooled down.
- Reinforce that these terms apply to all substances.
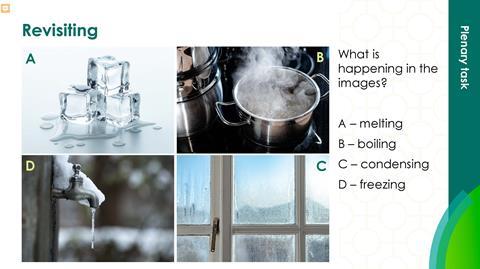
Revisit the introductory discussion (slide 24) and invite learners to discuss how their views have changed. Collect the worksheets.
Commentary
Discussing personal viewpoints with others allows learners to review each other and give feedback. It also allows them to see from other perspectives. Reaching consensus in groups stimulates this process. The teacher-led plenary discussion helps learners whose thinking has not moved forward and gives you an opportunity to assess the extent of any misconceptions in the class. Checking the written feedback on worksheets also gives you an opportunity to deal with misconceptions or confirm correct thinking.
Practical notes
Technician notes
In this resource, there is a demonstration of boiling water and a group-based observation where learners can observe ice melting.
Read our standard health and safety guidance and carry out a risk assessment before running any live practical.
Equipment
For the demonstration of boiling water:
- Bunsen burner
- Heat-proof mat
- Gauze
- Tripod
- Beaker
For the demonstration of ice melting (per group of 4):
- Beaker
Preparation
- Prepare enough ice for each group of 4 to have a beaker to observe.
Safety and hazards
- Wear safety glasses while using the Bunsen burner
- Risk of burning from Bunsen burner/hot glassware
Prompts and answers
What happens when water boils?
- ‘The bubbles contain a mixture of hydrogen and oxygen.’
- False
- ’The bubbles contain carbon dioxide.’
- False
- ‘The bubbles contain steam (water vapour).’
- True
- ‘The bubbles are empty (vacuum).’
- False
- ‘The bubbles contain air.’
- False
- ‘The bubbles contain oxygen only.’
- False
- Note: The initial small bubbles, seen as water heats up, contain oxygen.
What happens when ice melts?
- ‘The molecules in ice get smaller because water takes up less space than ice.’
- False
- ’The molecules in ice get warmer because the water is hotter than ice.’
- False
- ’The molecules move around more as water than they did in the ice.’
- True
- ’Ice molecules change to water molecules.’
- False
- ’Ice changes to water at 0°C.’
- True (if temperature is increasing)
- ‘Ice only melts above its melting temperature.’
- False
Downloads
What happens changes state slides
Handout | PDF, Size 1.97 mbWhat happens changes state student sheet scaffolded
Handout | PDF, Size 0.21 mbWhat happens changes state student sheet unscaffolded
Handout | PDF, Size 0.2 mbWhat happens changes state teacher notes
Handout | PDF, Size 0.42 mbWhat happens changes state slides
Presentation | PowerPoint, Size 12.87 mbWhat happens changes state student sheet scaffolded
Editable handout | Word, Size 0.71 mbWhat happens changes state student sheet unscaffolded
Editable handout | Word, Size 0.71 mbWhat happens changes state teacher notes
Editable handout | Word, Size 0.62 mb
Additional information
This lesson plan was originally part of the Assessment for Learning website, published in 2008. It was updated with new presentation slides added in 2025 by Emma Bickerstaffe.
Assessment for Learning is an effective way of actively involving students in their learning. Each session plan comes with suggestions about how to organise activities and worksheets that may be used with students.
Acknowledgements
V. Kind, Changing matter, Ed. Chem., 2001, 92
- Prepare(3)
 Resource
Students’ ideas about changes of state | Beyond appearances
Changes in state need changes in thinking to be understood, explore how to support learners to develop a new way of seeing state changes
 Resource
Improve graph skills for chemistry
A diagnostic exercise, practical and worksheet to assess and boost students’ grasp of graphing
 Course
Particle and atomic models | Self-led course
Strengthen your subject knowledge and discover teaching strategies to develop your learners’ understanding of the particle model and atomic structure
- Deliver(8)
 Class experiment
Supercooling and the energetics of freezing
Explore what happens when a liquid is supercooled and develop learners’ observation skills in this class practical
currently reading
 Lesson plan
What happens when a substance changes state? | Lesson plan | 11–14 years
Use this lesson plan, complete with scaffolded and unscaffolded student sheets, to secure learners’ understanding of changes of state
 Class experiment
Melting and freezing stearic acid
In this class practical students take the temperature of stearic acid at regular intervals as they heat and cool it. Includes kit list and safety instructions.
 Resource
Melting and boiling | Johnstone’s triangle worksheets | 11–14 years
Develop learners’ understanding of melting and boiling with this worksheet, including a teacher demonstration for learners to observe
 Resource
Melting and boiling points | Developing understanding | 11–14 years
Deepen understanding of melting and boiling points and how these are represented at different conceptual levels of thinking
 Resource
Changes of state | Structure strip | 11–14 years
Use scaffolded prompts to support learners to write about changes of state
 Poster
Evaporation in action
Boost your 11–14 students’ knowledge and understanding of separation techniques with this poster, fact sheet and practical activity
 Poster
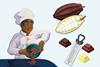
The science of melting chocolate
Use this infographic with your 11–14 students to develop their knowledge of changes of state and their graphing skills
- Literacy(3)
 Resource
Particle model | Key terms support | 11–14
Language support pack for particle model, with key terms list, accessible glossary, Frayer models and unscrambling definitions
 Resource
Particle model | Reading comprehension | 11–14 years
Use this reading comprehension based on a real science research news story to develop literacy skills and confidence
 Resource
Particle model | Structured talk | 11–14 years
In this speaking and listening task learners work together to build word bridges, building and sharing understanding by applying the particle model
- Enrich(6)
 Extension
Boiling point: a surprising measurement | Stretch and challenge | 11–14 years
Develop critical thinking skills by guiding learners to evaluate possible explanations for an unexpected experimental result
 Exhibition chemistry
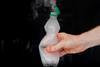
Forming a cloud in a bottle
Explore evaporation, condensation and equilibrium with this quick and easy demonstration
 Class experiment
Rate of evaporation
Use this class practical to measure and compare the rate of evaporation of propanone under different conditions
 Exhibition chemistry
Boiling without heating
Overcome common misconceptions about changes of state and vaporisation with water, a syringe and reduced pressure
 Resource
Salt (for cooking) activities | 11–14 years
Uncover the properties and health implications of salt in our diets
 Resource
Making ice | In Search of More Solutions | 11–14 years
Explore the properties of water and ice in this planning activity
No comments yet