


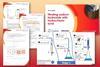
Use this practical to reinforce students’ understanding of pH by preparing and testing acidic and alkaline solutions
In this experiment, students prepare a series of solutions by dilution, using deionised water with hydrochloric acid or sodium hydroxide. Each solution approximates to a pH number. Students then confirm what they have done using universal indicator. The practical shows that a solution with a given pH number differs in concentration from the one with the next pH number by a factor of 10.
The experiment can also be used as a teacher demonstration.
To save time, students can work in groups of four. One pair of students makes the acidic solutions; the other pair makes the alkaline solutions. They then put the two sets of solutions together to make one set covering the pH range from 1 to 13.
Equipment
Apparatus
- Eye protection
- Test tubes, x13 (see note 6 below)
- Test tube rack(s), with sufficient space for 13 test tubes
- Beakers, 100 cm3, x2
- Measuring cylinders, 10 cm3, x2
- Dropping pipettes (optional)
Chemicals
- Deionised or distilled water
- Dilute hydrochloric acid, 0.1 M
- Dilute sodium hydroxide solution, 0.1 M
- Universal indicator solution (HIGHLY FLAMMABLE), full range, ideally in small dropping bottles
- pH indicator chart
Health, safety and technical notes
- Read our standard health and safety guidance.
- Wear eye protection throughout.
- Dilute hydrochloric acid, HCl(aq) – see CLEAPSS Hazcard HC047a and CLEAPSS Recipe Book RB043.
- Dilute sodium hydroxide solution, NaOH(aq), (IRRITANT at concentration used) – see CLEAPSS Hazcard HC091a and CLEAPSS Recipe Book RB085.
- Universal indicator solution (HIGHLY FLAMMABLE) – see CLEAPSS Hazcard HC032 and CLEAPSS Recipe Book RB000.
- Test tubes with a capacity of around 10 cm3 are ideal. The test tubes should be as clean as possible. Test tubes, dropping pipettes and measuring cylinders should be washed in tap water and then rinsed with deionised or distilled water.
Procedure
Students 1 and 2
- Number the test tubes 1–7.
- Half-fill test tube 1 with the hydrochloric acid solution.
- Transfer 1 cm3 of the hydrochloric acid into the measuring cylinder. Add distilled or deionised water to the measuring cylinder, up to the 10 cm3 mark.
- Pour some of the resulting diluted solution from the measuring cylinder into test tube 2, enough to come to a similar height as the solution in test tube 1.
- Carefully, pour away all but 1 cm3 of the solution remaining in the measuring cylinder. Now add distilled or deionised water to the measuring cylinder up to the 10 cm3 mark. Pour the resulting solution into test tube 3. Continue in this way until you have solutions in test tubes 1 to 6. Put only distilled or deionised water into test tube 7.
Students 3 and 4
- Repeat instructions 1–5 using the sodium hydroxide solution instead of hydrochloric acid. Number the test tubes 8–13.
Both groups
- Put the two racks of test tubes together so that the solutions are in order 1 to 13. The test tubes now have solutions in them with pH 1 (test tube 1) to pH 13 (test tube 13).
- Add a drop of universal indicator to each test tube. Rock each test tube from side to side to mix the contents. Add more universal indicator solution to each test tube if needed to allow the colours to be seen more clearly. Be sure to add the same number of drops of indicator to each test tube.
- Compare the colours of the solutions with the pH indicator chart.
Teaching notes
The depth of discussion will depend on the level of the students involved.
The pH of the solutions in test tubes 5, 6, 8 and 9 will not be very accurate. It is not possible to get pH 7 by diluting the pH 6 solution. Successive dilutions past 6 give solutions with pH progressively closer to, but never quite reaching, pH 7. The same applies to further dilutions on the alkaline side of neutral.
The colour you get in test tube 7 might tell you something about the quality of your deionised water.
Students sometimes worry about overfilling the measuring cylinder to a level above the 10 cm3 mark. However, this will not make much difference to the overall outcome.
Draw out that the students have had to dilute solutions by 10 to change from one pH number to the next. A solution of pH 1 is ten times more acidic (has a greater concentration of hydrogen ions) than a solution of pH 2. A solution with pH 4 is not ‘very acidic’ as is often stated.
The letter p in pH stands for ‘power’ (or ‘potenz’ in German) and refers to the concentration of hydrogen (H+) ions in the solution when expressed in the form 10–n mol dm–3, where n is the pH. The relationship between pH number and hydrogen ion concentration can be expressed as:
pH = –log10 [H+(aq)].
Universal indicator is a mixture of indicators made in such a way as to give, as far as possible, a different colour for each pH number. Students should notice that it is not very effective at the extremes of the range.
Additional information
This is a resource from the Practical Chemistry project, developed by the Nuffield Foundation and the Royal Society of Chemistry.
Practical Chemistry activities accompany Practical Physics and Practical Biology.
© Nuffield Foundation and the Royal Society of Chemistry
No comments yet