Get started
Watch a demonstration of this experiment and download the technician notes from the Education in Chemistry website: rsc.li/4dJx1cX
My first Exhibition chemistry article used a large block of dry ice to demonstrate its reaction with magnesium, but I have never outlined some of the simpler things you can do with the dry ice (solid carbon dioxide). When a shipment of bacteria arrived for the biology department in a big box of dry ice, I knew exactly how to ensure the CO2 wouldn’t go to waste. This interesting material can assist your teaching in so many ways, but the colour-change reaction in a flask loaded with water and indicator is perhaps the most famous.
Kit
- 100 g dry ice (see tips)
- Safety glasses
- Insulating gloves (e.g. thick garden gloves, not rubber)
Demonstration 1
- Empty 500 cm3 PET bottle made for carbonated beverages
- Rubber bung or cork to fit bottle
- Safety screens
Demonstration 2
- Large measuring cylinder (e.g. 500 cm3 or 1 L)
- Long stirring rod
- Universal indicator (DANGER highly flammable, eye irritant, harmful by ingestion)
- 20 cm3 sodium hydroxide, 0.4 mol dm-3 (irritant)
Demonstration 3
- Two large measuring cylinders (e.g. 500 cm3 or 1 L)
- Two long stirring rods
- Universal indicator (DANGER highly flammable, eye irritant, harmful by ingestion)
- 500 cm3 sodium hydroxide, 0.1 mol dm-3
- 500 cm3 ammonia, 0.1 mol dm-3
Health, safety and disposal
- Your employer’s model risk assessments are unlikely to cover the demonstrations. CLEAPSS members can obtain a Supplementary Risk Assessment (SRA 030) from them.
- Wear eye protection.
- If showing to a primary class do not seat them on the floor in case dropped pellets scatter towards them.
- Never seal bottles containing dry ice.
- Levels of carbon dioxide will remain safe in a well-ventilated lab, but do not leave dry ice in contained spaces like small store cupboards or fridges/freezers, where concentrations could rise to hazardous levels.
- Pour used solutions down a foul-water drain.
In front of the class
Ensure students are 2–3 metres away from all demonstrations. Work in a well-ventilated space. Wear eye protection.
Demonstration 1. Sublimation: solid carbon dioxide transitions straight into a gas
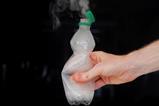
Use safety screens to protect the audience and demonstrator. Use insulated gloves to place a couple of pellets of dry ice in an empty carbonated drinks bottle and insert a rubber bung (do not seal with the lid). A few moments later the bung will fly off with a pop. You can show the students that the pellets remain inside and there is no liquid present despite the gas pressure causing the bung to pop off.
Demonstration 2. A colourful neutralisation accompanied by cloud-filled bubbles
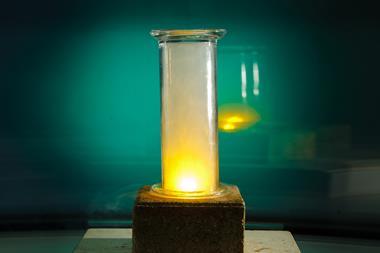
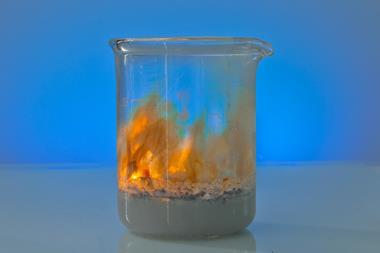
Three-quarters-fill a large measuring cylinder with tap water (see tips). Warm water is not essential but will make the cloud effect more dramatic. Add a splash of universal indicator to give a clearly visible green colour. Stir the indicator through and add a few millilitres of 0.4 mol dm-3 sodium hydroxide to turn the solution purple. Finally, use insulated gloves to add a handful of dry ice pellets. The pellets will sink to the bottom of the solution, cloud-filled bubbles will rise to the surface, spilling a mist of water over the desk. After a few moments the purple solution will turn green and then, after a delay, yellow and finally orange.
Demonstration 3. Behaviour of strong and weak bases
If you are exploring the difference between strong and weak acids and bases, repeat the demonstration above with two 0.1 mol dm-3 solutions of ammonia and sodium hydroxide of equal volume. Students might expect the two solutions to behave the same way but the weak base changes colour immediately and steadily moves through the full range of colours, while the strong base remains purple for some time before skipping through the shades of blue to go green straight away. This highlights why indicators are unsuitable for titrating weak acids with weak bases.
Tips
- You can buy dry ice online. As of July 2024, a 2.5 kg pack costs around £33.
- Alternatively, you can make it yourself but use tap water: deionised water is likely to already be acidic due to dissolved carbon dioxide from the atmosphere.
Teaching goal
As the dry ice is dropped into the water, bubbles of carbon dioxide (CO2) form from the sublimation of the dry ice. Water from the bulk solution evaporates into the bubbles but under the cold, humid conditions, a mist rapidly forms. The misting effect does not happen when water is replaced by an alcohol. Meanwhile, at the edge of the bubble, CO2 dissolves into the water and a small amount reacts to form carbonic acid (H2CO3):CO2(aq) + H2O(l) ⇋ H2CO3(aq)
Sodium hydroxide is a strong base. Essentially, all the hydroxide ions dissociate into solution when we add it to the tap water, and this causes the pH to shoot past 11 leading to a rapid change from green to purple. As hydrogen ions form in the solution following the addition of the dry ice and the dissociation of the carbonic acid, they react with the hydroxide ions, so the universal indicator changes from purple through to green. Eventually as more CO2 dissolves, the solution becomes slightly acidic. Yellows and shades of orange can be seen but the high first pKa (6.35) usually prevents the final change to red.
More resources
- Find out how to expand this demonstration to use a wide range of indicators with Indicators and dry ice.
- See Rainbow fizz revisited to understand why indicators change colour in different ways.
- Sublime iodine demonstrates the reverse change of state (deposition).
- Explore the density of CO2 with Fire stopper and Floating gas bubbles.
- Other changes of state you can demonstrate include the Heating curve for tert-butanol, Balloon in a bottle and An icebreaker for thermodynamics.
Downloads
Demonstrations with dry ice technician notes
Experiment | Word, Size 0.46 mbDemonstrations with dry ice technician notes
Experiment | PDF, Size 0.18 mb







No comments yet