Use this separation technique to obtain pure water from a coloured solution
The value of experiencing live practical work cannot be overstated. Numerous studies provide evidence of its value in terms of learner engagement, understanding, results and the likelihood of continuing to study chemistry or work in a related field.
Use this video to complement live practical work, or to help learners understand the methods, equipment and skills when they cannot access the lab.
Chapter titles: 00:10 Introduction to distillation; 01:07 Carrying out the experiment; 03:44 Animation; 04:10 Alternative method: Quickfit apparatus; 04:52 Testing the distillate.
Teacher notes
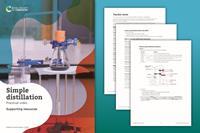
Full teacher notes are available in the supporting resources booklet (also available in MS Word), including ideas for how to use this video and the accompanying activites and answers to use as part of your teaching.
-
-
Learner slides
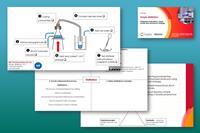
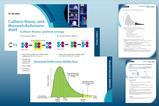
Integrated instructions, Frayer model and Johnstone's triangle
Download as: MS PowerPoint -
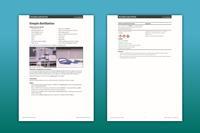
Notes on running the practical experiments
Ask learners to work in pairs. Demonstrate how to set up the equipment first (either in-person or via the video), so that you can emphasise health and safety issues. Remind learners that they must wear eye protection and direct them to the relevant student safety sheets (SSS).
Do not run the practical for too long as the ice-water can heat up and it is possible to get scalding steam coming out of the test tube. If this happens, learners will not get any solid in the flask that they are heating. You can show the solid at the end more safely using the Liebig condenser and quickfit apparatus. See the Preparation of an organic liquid practical video and technician notes for detailed instructions of this demonstration.
It is important that learners clamp the flask in the correct place and do not overtighten it. Learners can practise turning the Bunsen burner (SSS092) flame down to ensure gentle boiling of the coloured solution. If they turn down the gas too quickly, the flame will go out and they will need to relight the Bunsen. When testing their sample, learners should be aware of anhydrous copper(II) sulfate’s hazards (SSS040).
Use the video’s animation and Johnstone’s triangle, available in the PowerPoint slides, to help learners link their observations to what’s going on at the submicroscopic level.
Health, safety and technical notes
Read our standard health and safety guidance and carry out a risk assessment before running any live practical. Refer to SSERC/CLEAPSS Hazcards, recipe books and student safety sheets. Hazard classification may vary depending on supplier. Download the technician notes for the full equipment list, safety notes and disposal information.
Procedure
- Place a clamp stand on a heatproof mat and set up a Bunsen burner on the stand and mat.
- Place a tripod and gauze above the Bunsen burner.
- Stand a conical flask on the gauze and carefully clamp the neck of the flask to keep it stable.
- Using a second clamp and boss, clamp a test tube and stand it in a beaker of ice-water.
- Measure out 20 cm3 of the solution in a measuring cylinder and pour it into the conical flask.
- Add a couple of anti-bumping granules to the flask.
- Take the delivery tube and place the bung in the top of the conical flask and the other end of the delivery tube in the test tube in the beaker of ice-water.
- Light the Bunsen burner on the yellow safety flame, then open the air hole so you have a blue flame.
- Heat the solution until it boils, then turn down the Bunsen burner flame at the gas tap so it boils gently. Remove the Bunsen from under the flask if the solution starts to boil rapidly.
- When you have collected 1 cm3 of distillate, stop heating and remove your sample from the beaker of ice-water. Take care when handling hot glassware as it can cause burns.
- Test your sample for water by putting a small spatula of white anhydrous copper(II) sulfate onto a watch glass and adding a few drops of the distillate.
Find the integrated instructions for this experiment in the PowerPoint slides.
Real-world contexts
- Read this CPD article to find relevant contemporary contexts, such as medicine and fragrances, to share with your learners and develop their appreciation of chemistry in their lives.
- Show your learners how astronauts survive in space by using compression distillation on their urine.
- Add depth to a sequence of lessons on separation techniques with the context of caffeine.
- Highlight different career pathways with Olivia’s job profile. She did a Scottish Vocational Qualification (SVQ) and is a senior laboratory technician who uses distillation in her work.
Key terms
Learners will need to have a clear understanding of the following scientific terminology:
- Simple distillation – the process of separating a liquid from a solution through evaporation followed by condensation.
- Separation – the process of dividing a mixture up into its component parts.
- Solution – a mixture formed by a solute dissolved in solvent.
- Solvent – the liquid a solute (solid) dissolves in to form a solution.
- Solute – a substance that will dissolve in a solvent.
- Dissolve – when a solute mixes completely with a solvent to produce a solution.
- Soluble – a substance that will dissolve.
- Mixture – two or more different substances, not chemically joined together.
- Pure – a substance made of only one element or compound.
- Evaporate – a change of state from liquid to gas.
- Condense – a change of state from a gas to a liquid.
- Vapour – a gas or small drops of liquid suspended in a gas.
- Distillate – the liquid collected at the end of a distillation experiment.
You will find a template, example Frayer model and suggested answers for the term ‘distillation’ in the PowerPoint slides. Find more examples and tips on how to use Frayer models in your teaching.
Cross-curriculum links and skills
This practical develops:
- Accurate observation and measurement skills.
- Manipulative skills to set up and use complex apparatus.
- Problem-solving skills and finding solutions to common issues that occur during distillation.
Common misconceptions
Misconception: substances disappear when they dissolve. Evaporation shows this is not true. Use scientific language to avoid introducing the idea of chemicals disappearing. Carry out a quick experiment to show that the mass stays the same if you weigh a solvent and solute before and after they are mixed to form a solution.
Misconception: many learners will say that sodium chloride is now a liquid since it has dissolved in water. Technically, it did not melt and undergo a state change into a liquid, rather it was pulled into solution. Highlight the differences between the states, such as ‘liquids’, and ‘aqueous/in solution’.
Misconception: all mixtures are separated using only one separating technique. Provide learners with examples to show this is not the case, eg a mixture of iron filings and sulfur can be separated by a magnet or water (the iron filings sink and the sulfur floats).
Misconception: evaporation and boiling are the same thing. Use everyday contexts to explain the difference, eg a puddle dries up on a sunny day as water molecules evaporate (changes state from a liquid to a gas) but you don’t see bubbles in the water indicating that it is boiling. Use scientific language to emphasise their meaning and avoid confusion.
Misconception: filtration can separate solutions. Carry out a quick demo to show that it can’t. Pour a solution into a filter funnel and paper. Observe the solution run through the filter paper into the conical flask unchanged. Point out that there is no residue left on the filter paper. Then repeat using a suspension.
Misconception: a solution is a single substance. Ask learners to make a solution by dissolving copper chloride or sodium chloride in water and then ask them to heat the solution until the water evaporates off leaving the copper chloride or sodium chloride crystals. Use scientific language to reinforce the idea that a solution is formed when a solute dissolves in a solvent.
Misconception: boiling points increase as a substance is heated. Ask learners to make careful observations as they heat up some water until it boils. They should record the temperature at regular intervals and note down any observations about the liquid.
Misconception: the boiling/condensation point is different. Eg if it boils at 100°C, it must condense at 99°C.
Misconception: water goes around the condenser. Demonstrate how water flows through outer sleeve of the condenser, going in at the lower end and out at the higher end to promote more effective cooling. Point out the condenser’s inner tube and explain that this is where the vapour is cooled and condenses back to a liquid, ie the distillate.
More resources
- Display the water cycle infographic in your classroom and make cross-curricular links to physics, biology and geography with the modelling activity.
- Carry out this experiment with your 14–16 year-old learners to extract limonene, used in cleaning products and as a botanical insecticide, from orange peel.
- Use the fractional distillation practical and put the infographic poster up to show how crude oil is separated.
Downloads
Simple distillation supporting resources
Handout | PDF, Size 0.93 mbSimple distillation technician notes
Handout | PDF, Size 0.27 mbSimple distillation slides
Editable handout | PowerPoint, Size 0.28 mbSimple distillation supporting resources
Editable handout | Word, Size 1.37 mb
Additional information
The original video script, supporting resources and slides were written by Dorothy Warren. The technician notes were adapted by Sandrine Bouchelkia.


Practical videos | 14–16 years
Videos of core practical experiments for flipped learning, remote teaching or revision
- 1
- 2
- 3
 Currently
reading
Simple distillation
- 5
- 6
- 7
- 8
- 9
- 10
- 11
- 12
- 13
- 14




No comments yet